The first day of the Creepy Eyes QAL is here! And I can’t be more excited or nervous! During these weeks, I want to show you how the Foundation Paper Piecing and the Curved Piecing are not difficult techniques, and you can really enjoy it! And why not share this experience with other quilters all around the world?
Before starting, I want to mention that this QAL is sponsored by 2 online quilt related shops I adore. They are people that have encouraged and supported me since the beginning of my work. They trusted my work and have helped me to sell my patterns. And now here they are supporting my first QAL and I can’t be more thankful.
![]() Stages 1 and 2 are sponsored by Quilt Pattern Mart with a gift card for you to choose two pdf patterns from their online shop. Quilt Pattern Mart is an online shop where you can find the most popular modern and contemporary quilt patterns in the quilting world. Heather is the one running the shop and she is working hard to offer you the best patterns. Take a look at her website and show her a lot of love on social media @quiltpatternmart.
Stages 1 and 2 are sponsored by Quilt Pattern Mart with a gift card for you to choose two pdf patterns from their online shop. Quilt Pattern Mart is an online shop where you can find the most popular modern and contemporary quilt patterns in the quilting world. Heather is the one running the shop and she is working hard to offer you the best patterns. Take a look at her website and show her a lot of love on social media @quiltpatternmart.
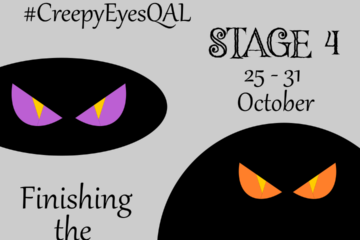
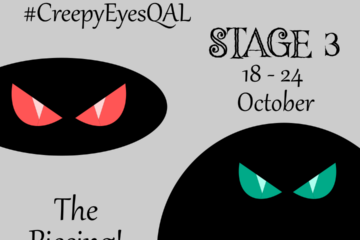
 Stages 3 and 4 are sponsored by Sewing by Sarah with a $50 gift card for quilting supplies from her online shop. Allison is the owner of this amazing online shop where you can find presser feet, cutting rulers, free motion quilting rulers, patterns and books (including mine), a variety of sewing/quilting tools, fabric, and some apparel and gifts for quilters. I wrote a blog post about my favourite things in her shop and I’m sure you will find something really useful for yourself. Take a look at her website and show her a lot of love in social media @sewingbysarahstore.
All those who participate in the QAL and share photos on Instagram of your progress during each stage using the hashtag #creepyeyesQAL will be eligible for one of the amazing prizes our sponsors are giving.
Let’s start!
I do the math and you do the magic!
This first stage of the QAL is about having everything ready to start our project.
- I already did the math! Yeah!! At first look, this pattern seems simple, with some eyes distributed on a big background. I can tell you there is a lot of math behind it to make the cutting and piecing as simple as possible. You will see how it’s really fast to make!!
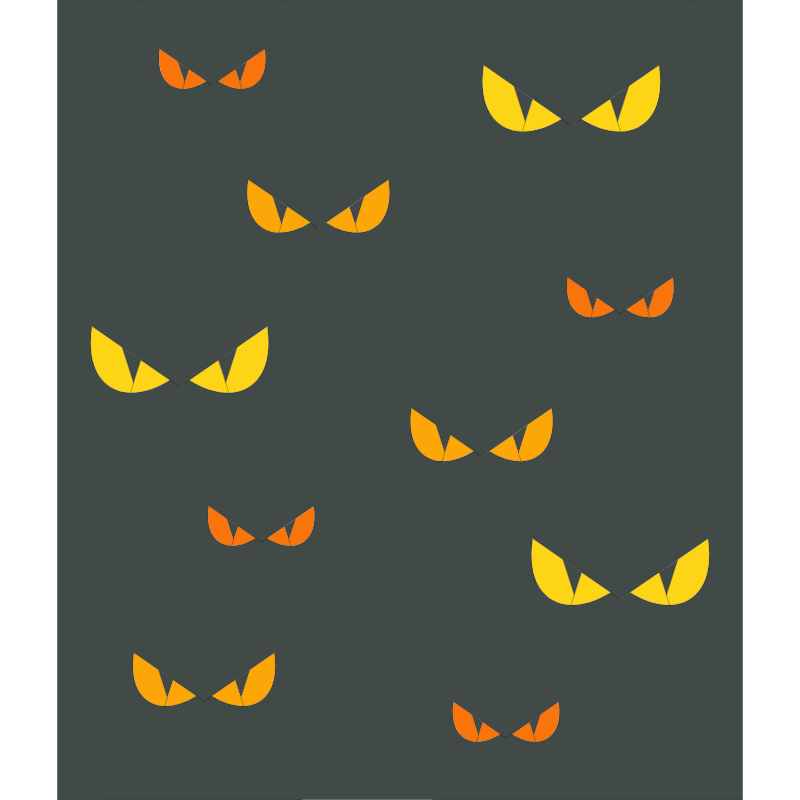
- You do the magic! Always!! As a pattern designer I like to feel that with a pattern, I put the basis of a design together. Then, quilters are the ones who really make amazing and unique projects with their fabric and colour combinations. And I want to add more for you! I like my patterns to be really customisable, and for you to be able to make a lot of different projects with my patterns. Look at the Creepy Eyes, don’t you think they could fit in any Halloween decor? Start to think about what you will make during this QAL, but wait to decide because I will be giving you really fun ideas below!
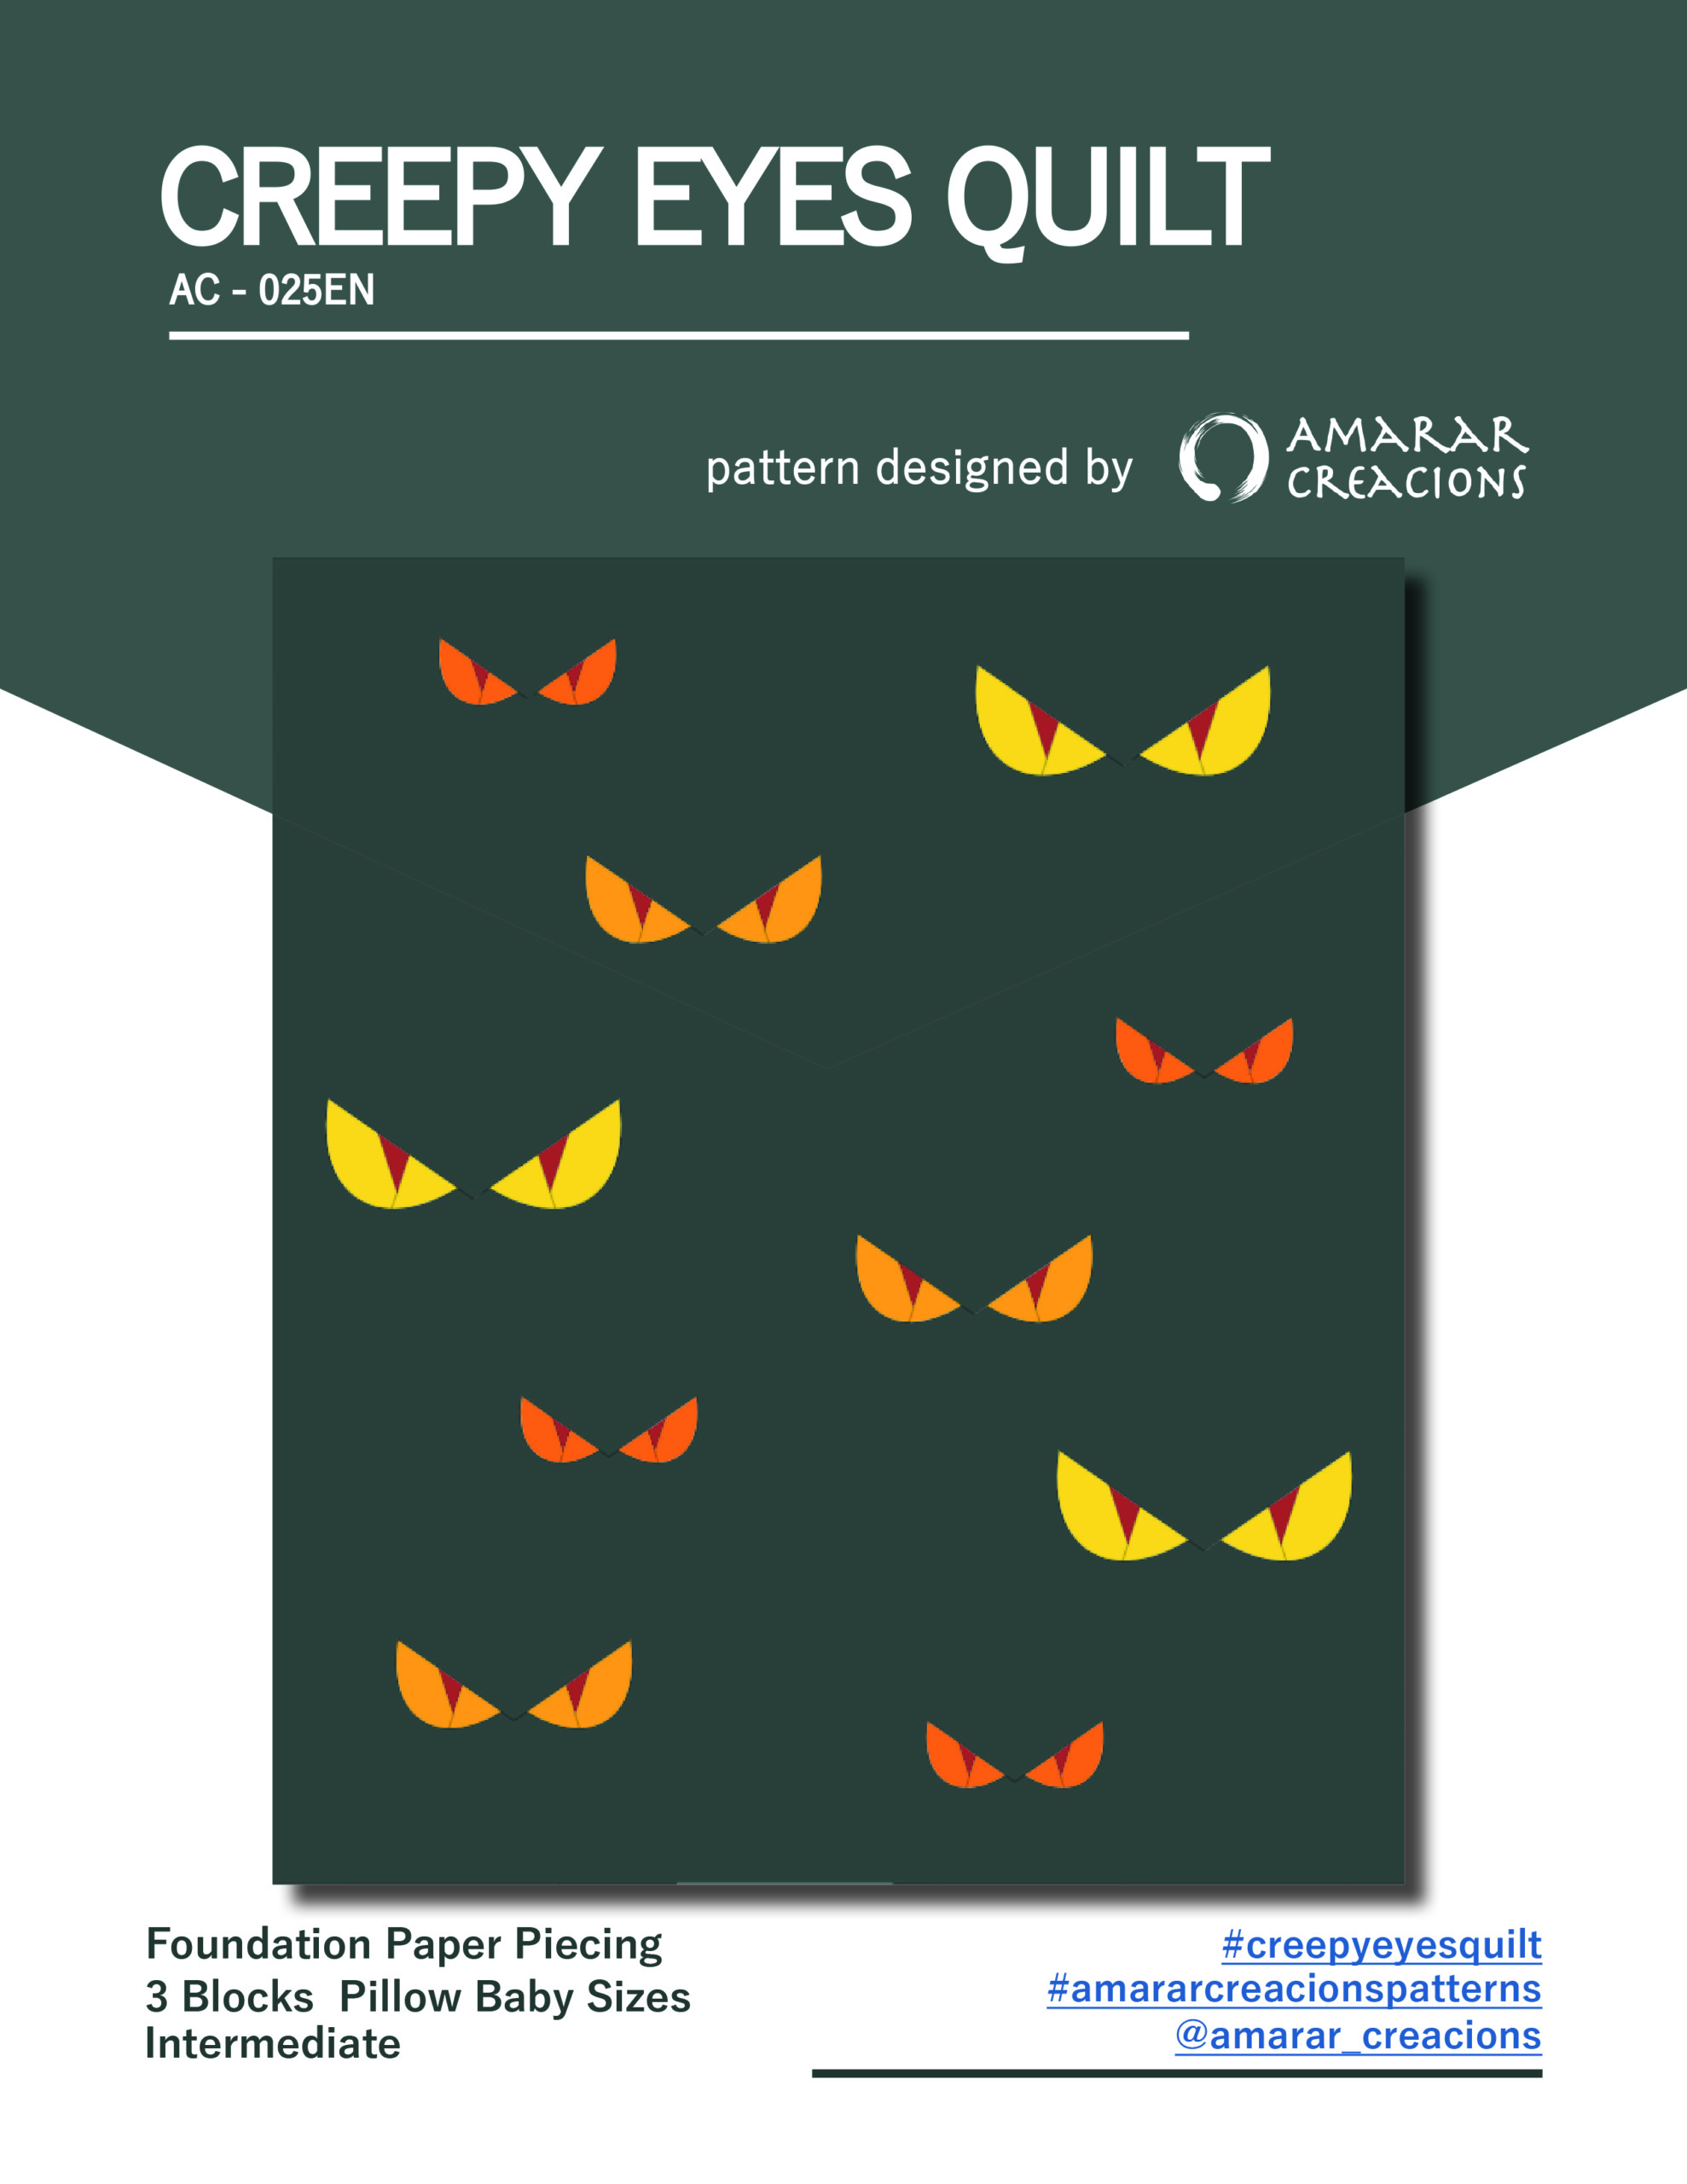
1. The pattern
First thing you need to make your Creepy Eyes project is the pattern. To celebrate the launch of this pattern, I set up 15% off on all my patterns until October 10th, but I want to help you to participate in this Quilt-Along and I have extended the 15% off to the Creepy Eyes pattern until the end of the QAL. So, you can get the Creepy Eyes Quilt pattern with the discount during the QAL and join us at any moment!
Since the pattern is a digital pdf, you can save it on any device and take it with you to the fabric store, or it easy to read anywhere. Super handy for checking fabric requirements at the fabric store. Pdf digital patterns are also great because they are so eco-friendly! You can read it and print only what you need, so no need to print and spend paper and ink that aren’t necessary. I know there are people who prefer to print and read it on paper and make printed notes…. so do whichever you prefer. I only wanted to share my way with you.
Creepy Eyes is an international pattern and provides all measurements in imperial and metric systems. It’s also set up for Letter and A4 paper sizes.
2. Your Imagination
Now that you know more about the pattern, it’s time for you to make the magic! Yeah!! I think one of the most important things, and one of the most fun parts of making a project is planning it. And you will make magic in 2 different stages:
- The project
- The colours/fabrics
2..1 The project
You may already have in your mind what you want to make during this QAL, but let me show you some ideas in case you are still thinking about it.
First, remember the sizes from the pattern for you to plan your project:
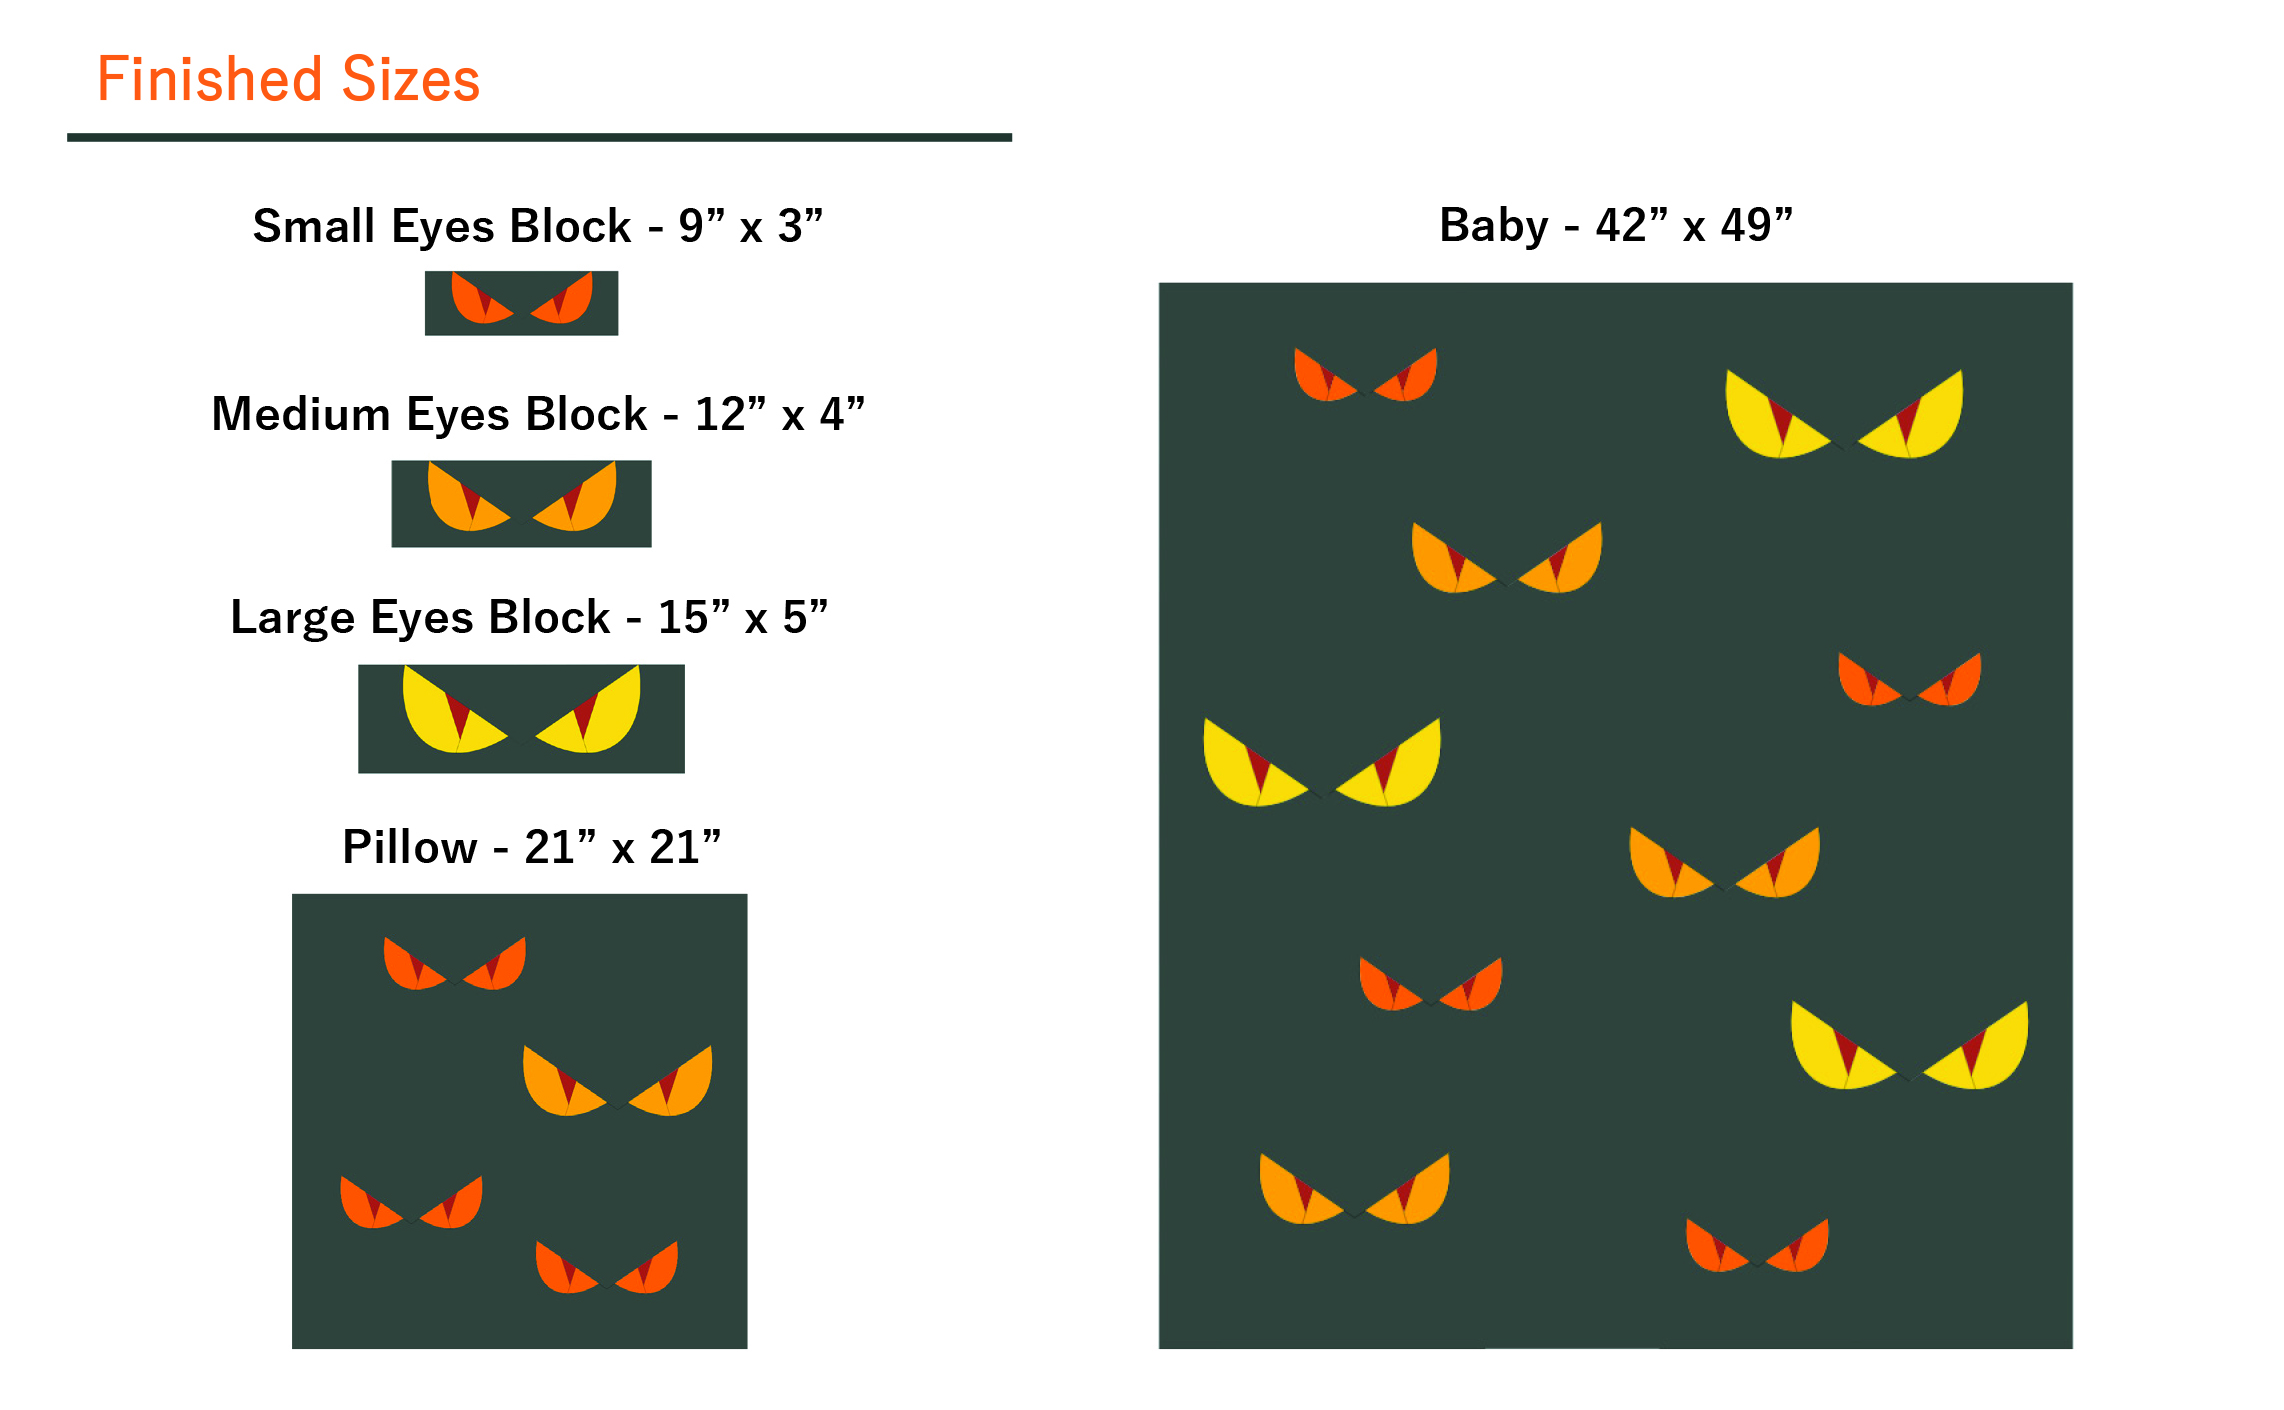
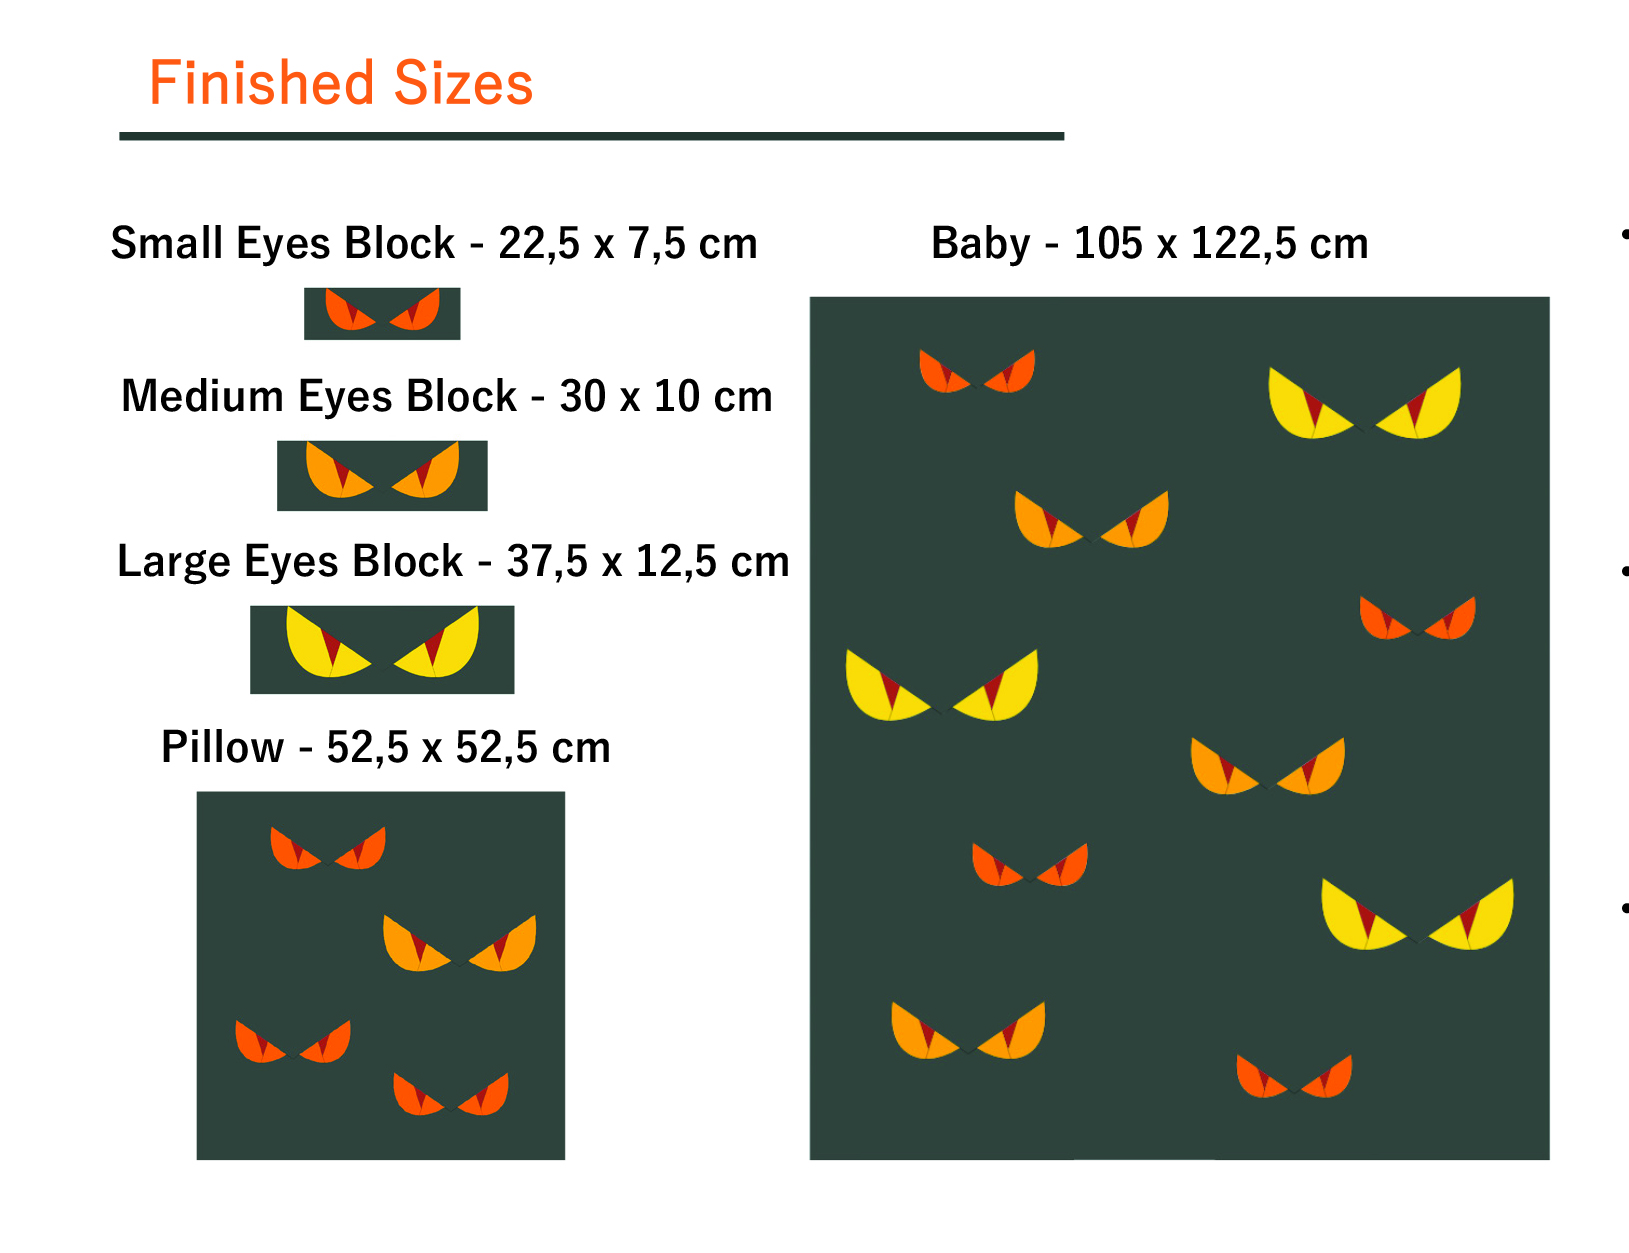
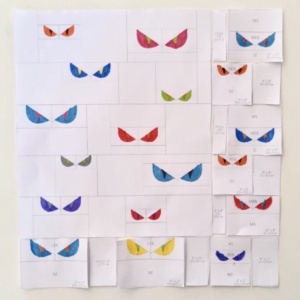
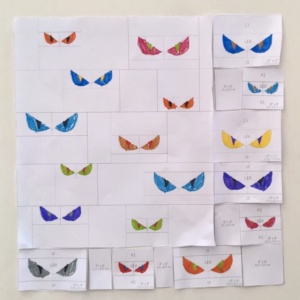
Based on that, you can imagine which kind of projects you can make. From using the Small Eyes Block to the baby size provided in the pattern instructions, you can make a lot of projects. Here there are some real examples:
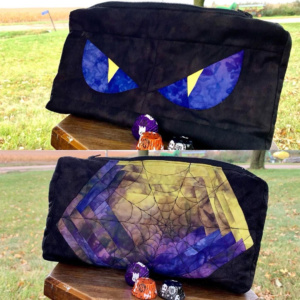
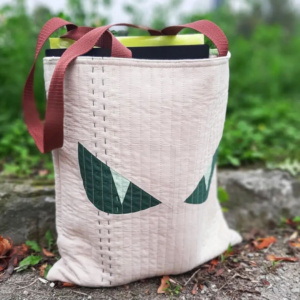
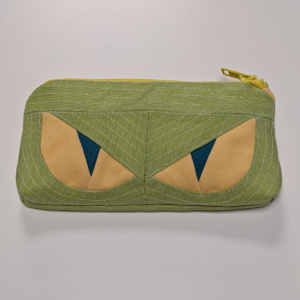
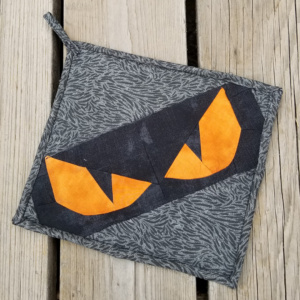
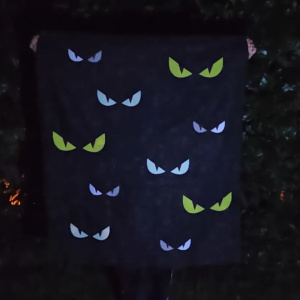
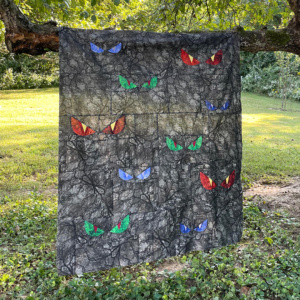
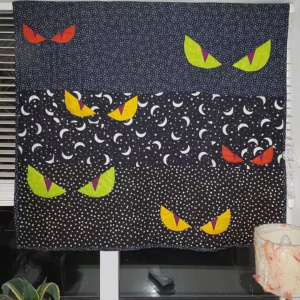
Using one or some Creepy Eyes blocks combined as you wish, you could make a pouch, a table runner, a mug rug, a pot holder, tote bag, Halloween flags to hang on your porch, a fabric bag for trick-or-treating or what about a cape for your children with a Big Eyes Block in the centre? Here you can see some examples from my testers to inspire you:

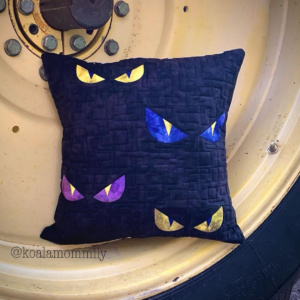
With the Pillow size (21″ x 21″) you can make a pillow but also turn it into a wall hanging to hang on your front door for Halloween. Or what about hanging it in one of your windows letting the light pass through it? That would be really fun, and just the right about of creepy!

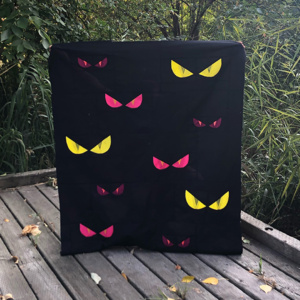
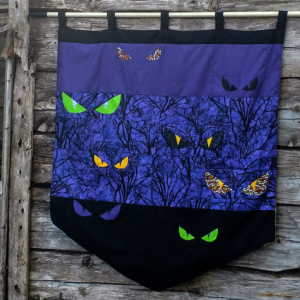
Using the Baby Size (42″ x 49″) you can make an amazing quilt for a child or for you! Or adapt it how my tester Andrea did to create this amazing flag using the baby size with a V-shape along the bottom. Or maybe a wall hanging, like Tanya made, using only 3 rows of the baby size.
After making the pattern, I have received a lot of comments telling me that it would be really great to have instructions for a bigger quilt than the baby size. I have decided to make a fun addition to the pattern that will allow you to plan any size project using the Creepy Eyes blocks. So make sure you have the latest version of the pattern. If you have version 1, download version 2 following the instructions on the first page of the pattern.
In the last pages of the pattern you will find 2 pages with puzzle pieces for you to use to plan a bigger size quilt, or completely customise the pattern.
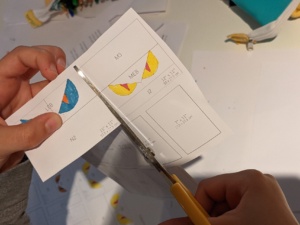
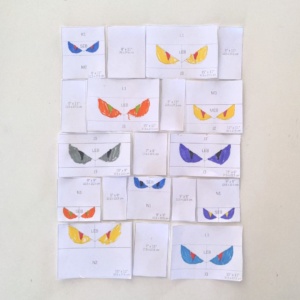
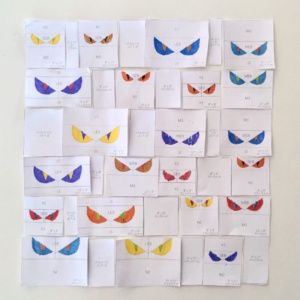
Since the QAL is for making some fun Halloween projects, I have decided to involve all the family in this. Here are my kids showing you how the puzzle pieces work.
Here’s what to do to customise:
1. Print one copy of the colouring sheet for the baby size of the pattern (p. 27 and one, or several, copies of the 2 last pages of the pattern), colour the eyes (so you will see them better) and cut the pieces.
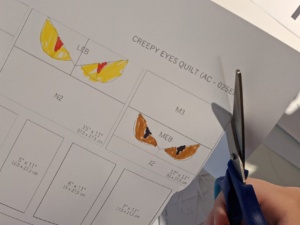
2. Place the baby colouring sheet on a table and place the small blocks on the sides of the baby colouring sheet, and at the top and bottom. This would be one way to make a bigger size.
NOTICE: The Creepy Eyes Quilt design is constructed in rows which have 2 different heights, and the puzzle pieces are 2 different heights, so use a puzzle piece with the corresponding row.
In this example we used the pieces to enlarge the baby size, so we placed puzzle pieces in the right and bottom sides of the baby size colouring sheet. Using the eye blocks and the spacers we can plan the pieces, and fabric, we need to add to the baby size. Also we can calculate the final size by adding to the baby size the width of the pieces added in the right and the height of the pieces added in the bottom. So, our result is a quilt:
-

- 57″ x 60″
-
- 57″ x 58″
And using the puzzles pieces alone to create really customised sizes:
-
- 37″ x 51″
-
- 57″ x 60″
Which project are you planning to make? Tell us in the comments!!
2..2 The colours
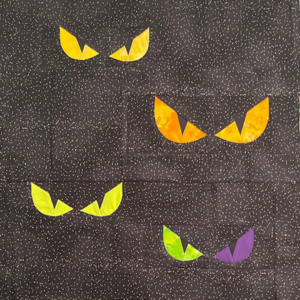
Ohhh the colours and the fabrics! For me it’s one of the most enjoyable parts of planning a quilt project, and maybe for that reason I created QuiltInk! A colouring app to digitally colour quilt patterns using real fabric swatch colours from most major brands. And of course you can colour the Creepy Eyes Quilt with QuiltInk, in fact, I will use QuiltInk colour versions to show you all the colour possibilities you have to plan the Creepy Eyes.
TIP: even if you are planning to use printed fabrics, you can also use QuiltInk to plan it. Choose a fabric brand on quiltInk and from there, choose the colours that are most similar to your printed fabrics. In this way you can have a very good idea of the final result.
So QuiltInk can be used in the 2 ways:
- You have the fabrics chosen before you start colouring and want to know how the quilt would look.
- If you want to make different colour samples to choose from to help decide your colour scheme/fabric. Then, open the colouring page of the Creepy Eyes (I will show the versions below). You can make as many colour versions as you would like! But beware, it’s addictive and the more colour versions you make, the more difficult it will be choosing between them!! I was joking!!
How to get started on QuiltIk: Go to www.quiltink.com, register (it is free and then you will be able to save your colour versions and share them on the public Wall). Next, go to the main page and search for the Creepy Eyes Quilt among all the amazing patterns there. Click over it and choose one of the colour layouts I have prepared for you to colour.
About the Creepy Eyes colouring process:
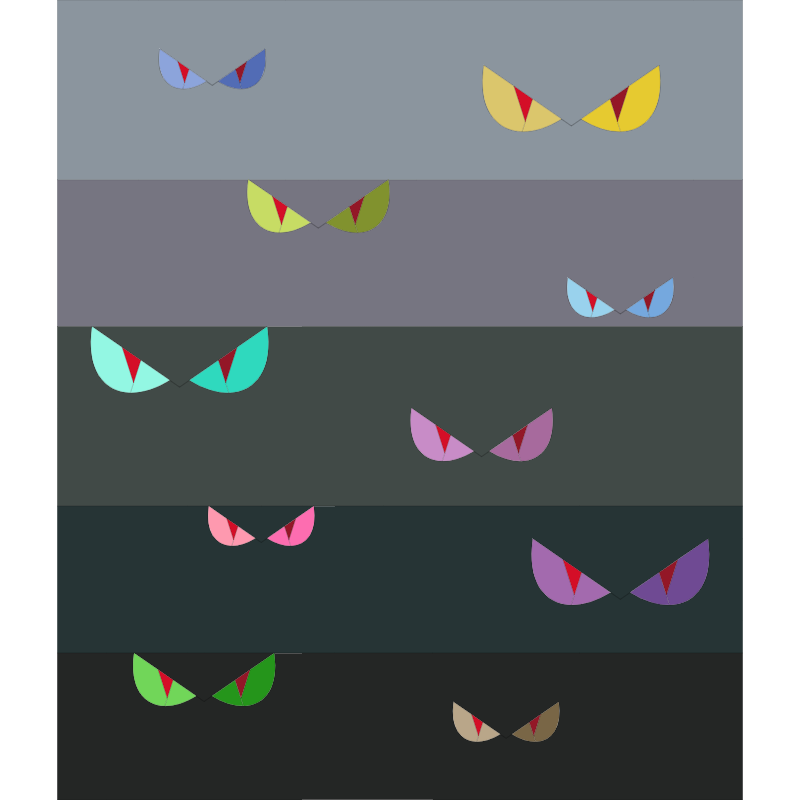
- Background: the pattern has instructions to make the background in one colour or using different colours/fabrics by rows. So, on QuiltInk you will have to choose one of these two backgrounds to plan your version.
-
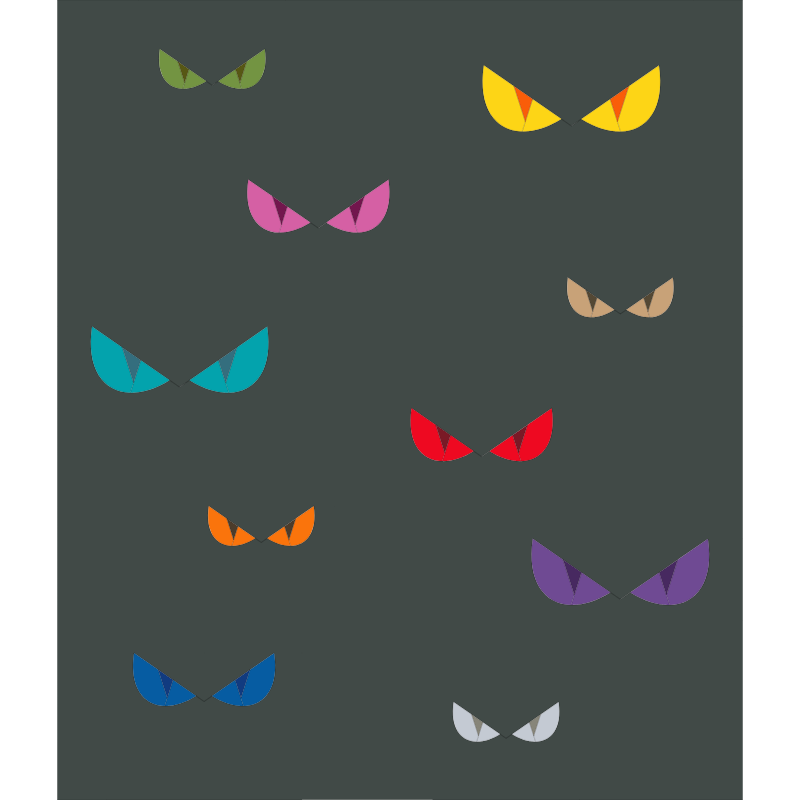
- The Eyes: The pattern provides instructions to make the eyes in different colours by sizes. All the big eyes in one colour, the middle ones in another one and the small in another one. The pupils are planned all in the same colour. And here is where you can custom your quilt too, so you can for example:
- Make all the eyes the same colour with the pupils in the background colour.
- Same as before but with the pupils in one colour.
- Eyes like the pattern instructions but the pupils in background colour.
- Or Eyes like the pattern but with different colurs by pupils.
- Every Eye in one colour and different colours for the pupils.
- Make all the eyes the same colour with the pupils in the background colour.


- Freestyle option on QuiltInk. This option will allow you to colour every piece of the pattern separately. I asked my daughter to make a colour version with this option and this is what came out. Cool right!! If I hadn’t already ordered my fabrics to make my quilt I would have chosen this option!! I’m in love with it!
2..3 The fabrics
Once we have chosen the colours, it’s time to prepare the fabric. Have a look at the fabric requirements and have them ready to start cutting in 3 days!
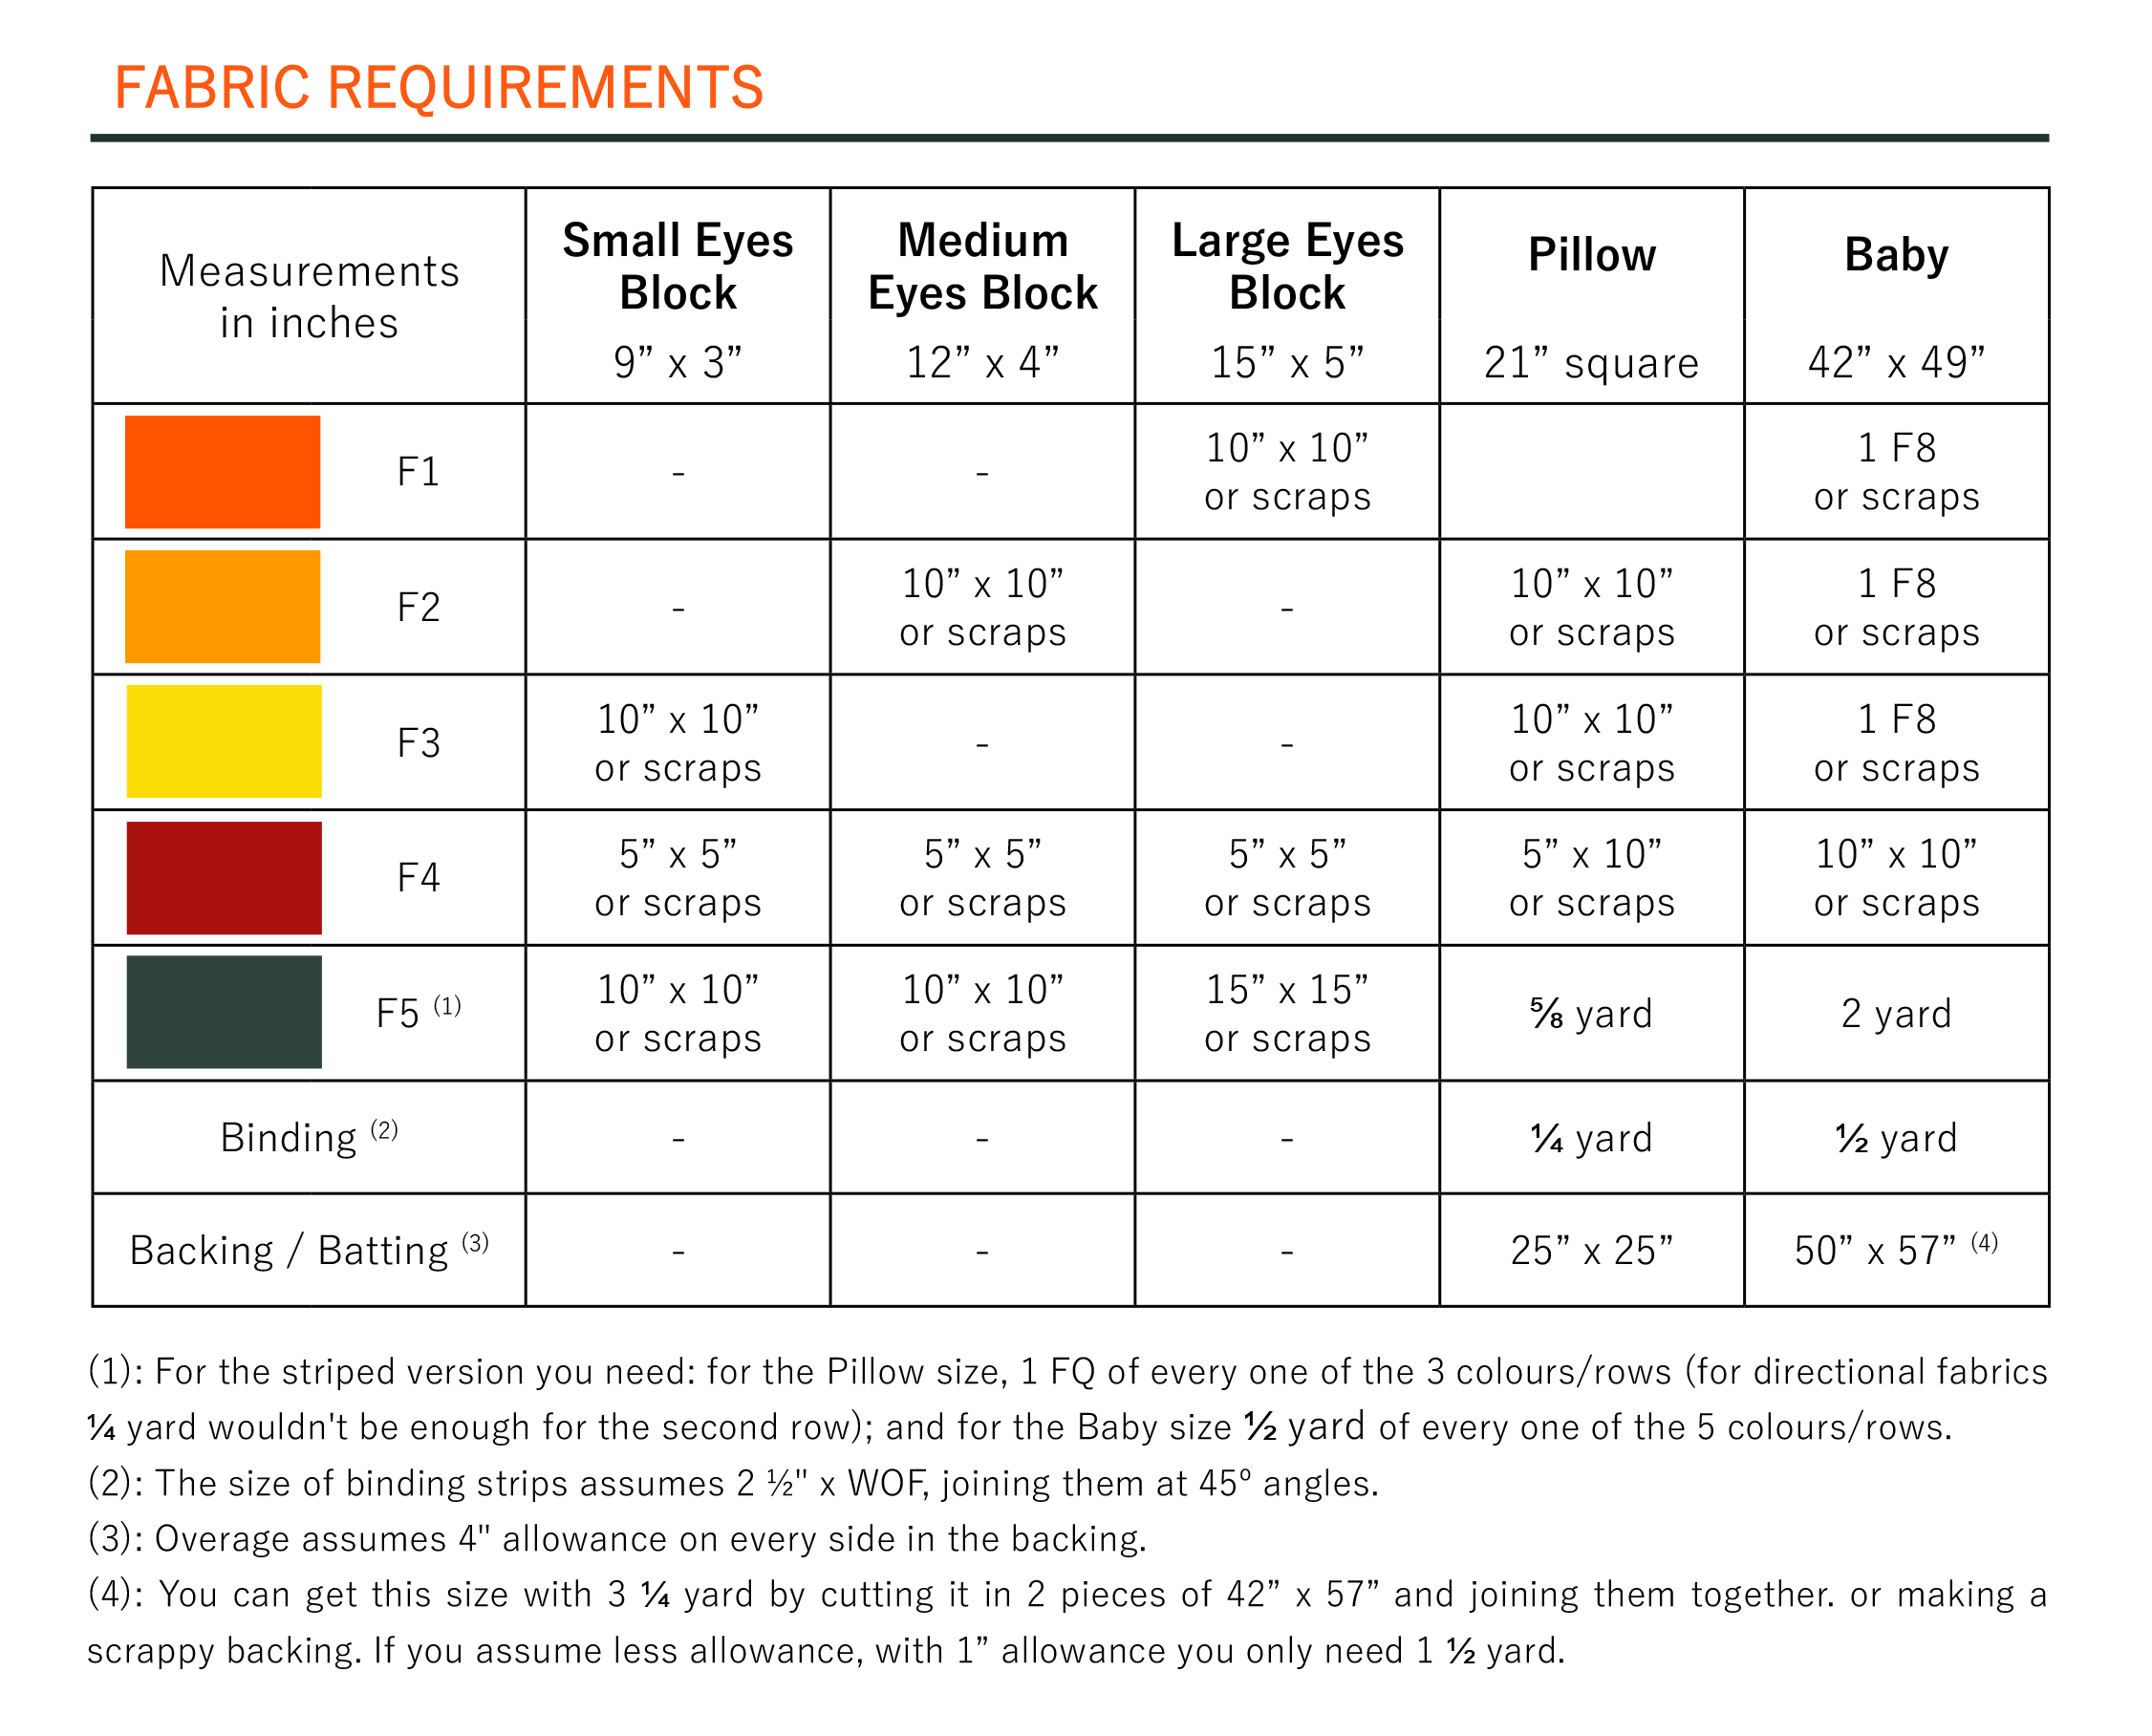
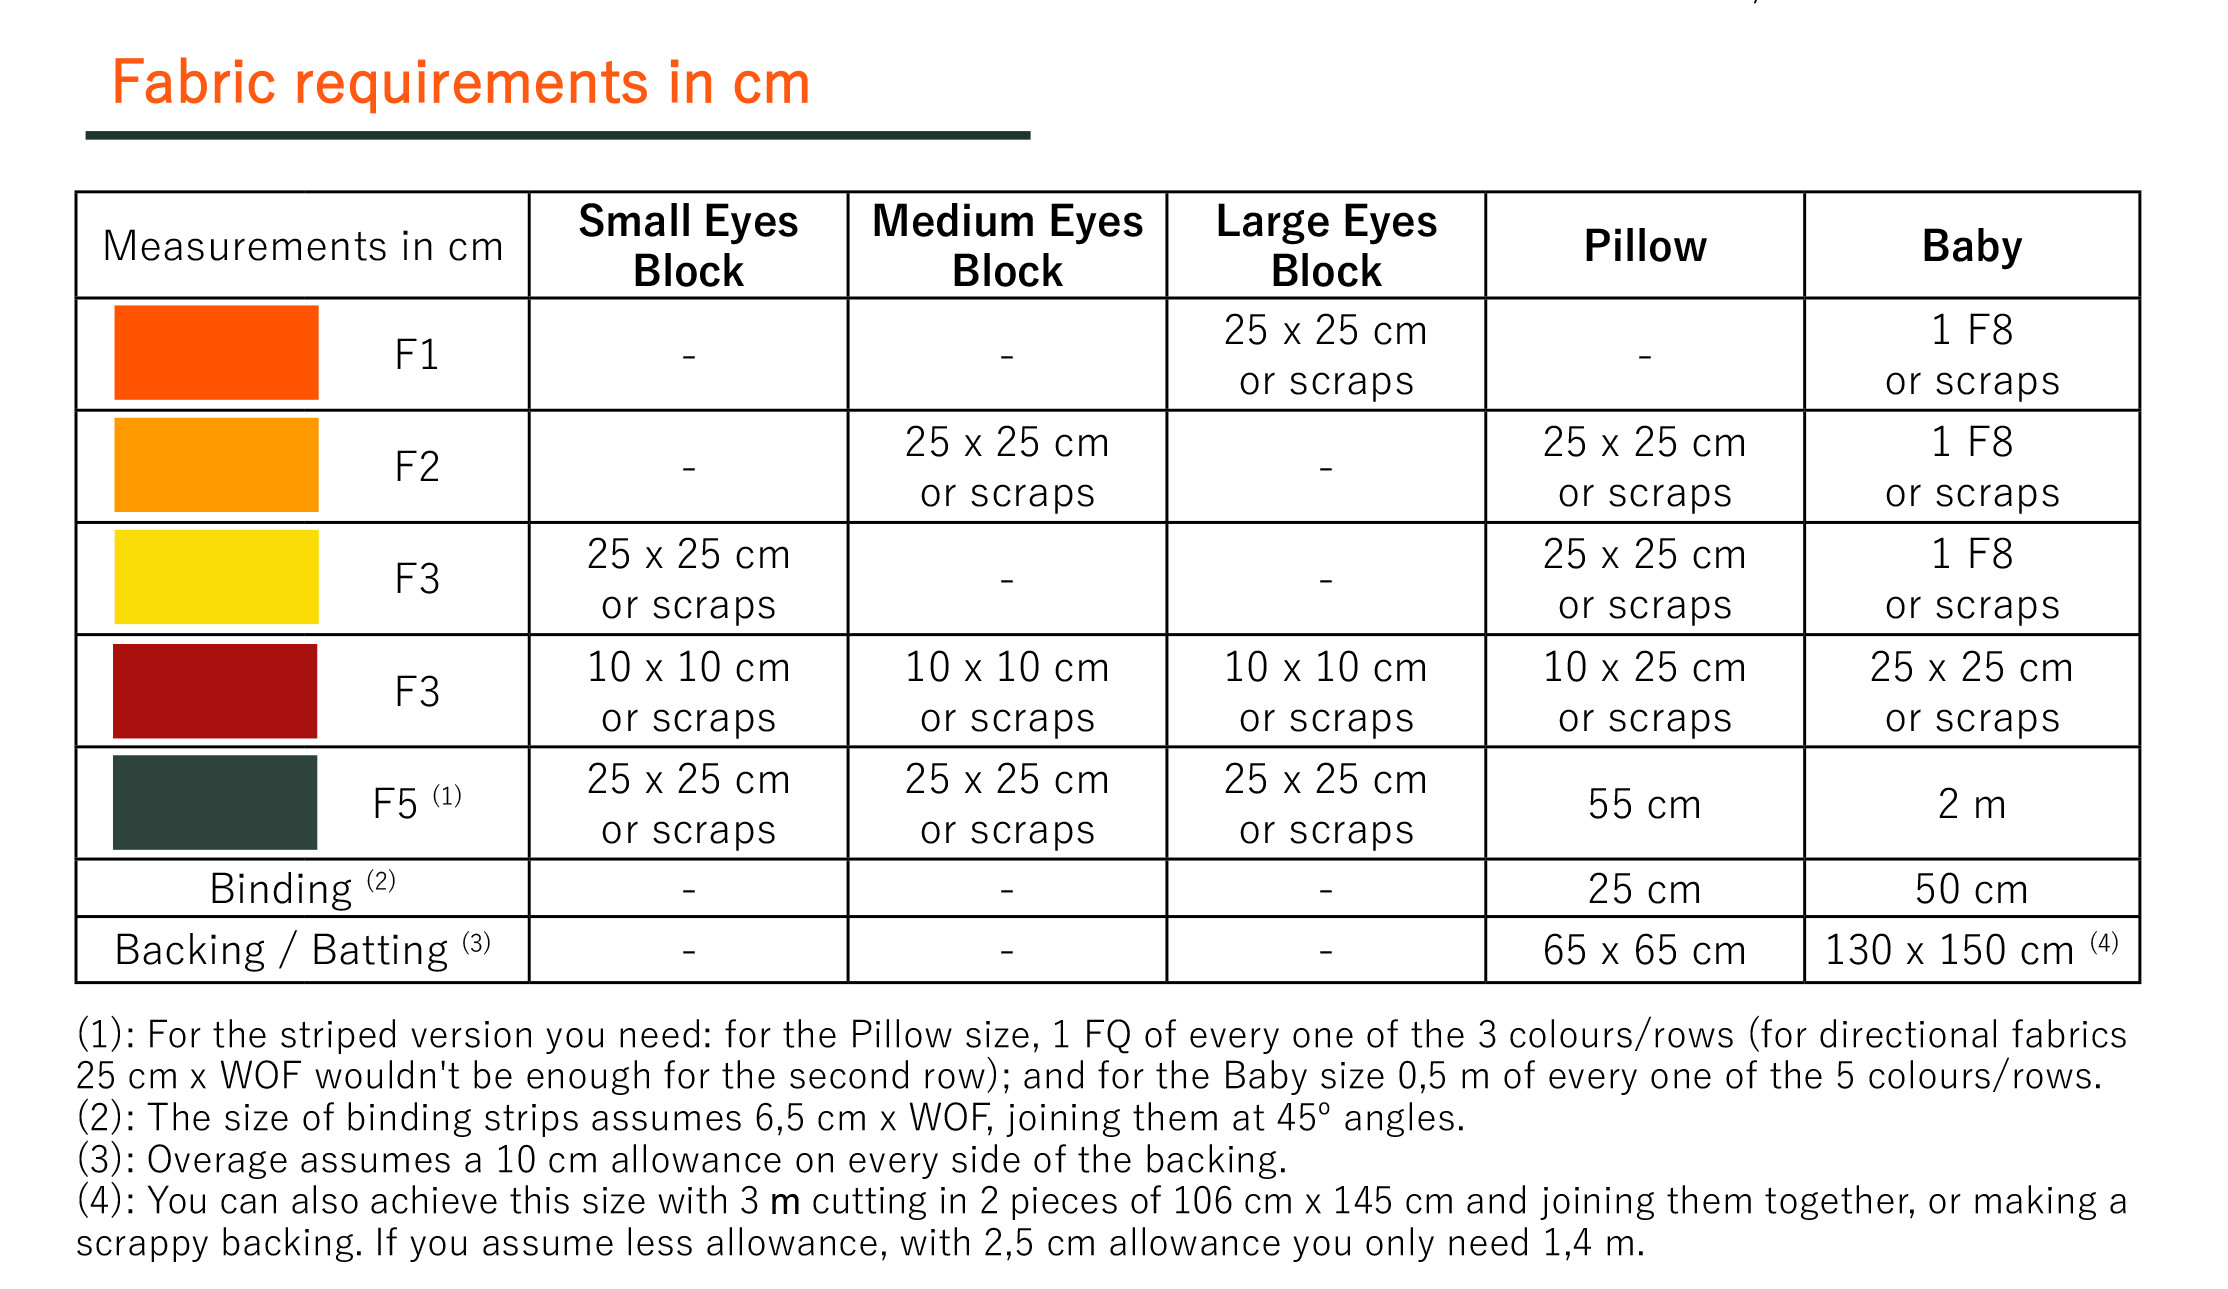
The pattern provides measurements in imperial and metric systems. As I explained in the pattern, the measurements in metrics are not exact translations from the imperials, I adapted them to be easy to cut the pieces. So, in metrics you will have a very little bit smaller finished project than in imperial, but not a lot. For example: the baby size will be 105 cm x 122,5 cm and it making using the imperial measures will be 106,68 x 124,46 cm. The difference is so small that it is worth it to use the metrics if you are most used to it.
And what fabric to use for yout project? It’s a very personal choice and like I said before, this is where every one of you makes the magic.
For Halloween there are a lot of fabric brands that have seasoned fabrics and taking a quick look in the marked you can find a lot of them. But they don’t need to be seassoned fabrics, sure you have at home a lot of fabrics perfect for this project!
For the QAL, I will be making a version like the pattern cover but using different Kona fabrics from what I told you in the pattern. For this version I chose a background from Andover fabrics, the Midnight Haunt – Spooky Damask Night. And for the eyes, the Pollen, Flame, Poppy and Ruby from the Phospore 21 collection by Libs Elliot. For the backing, I will be using Midnight Haunt – Night Flight Inky by Andover.
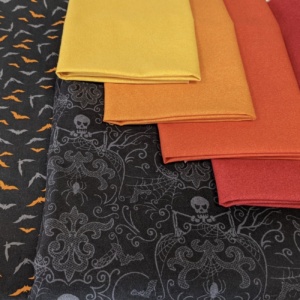
As you see I chose a directional fabric for the background so I can show you how to cut the templates with directional prints.
I can’t wait to get started!
3. Materials
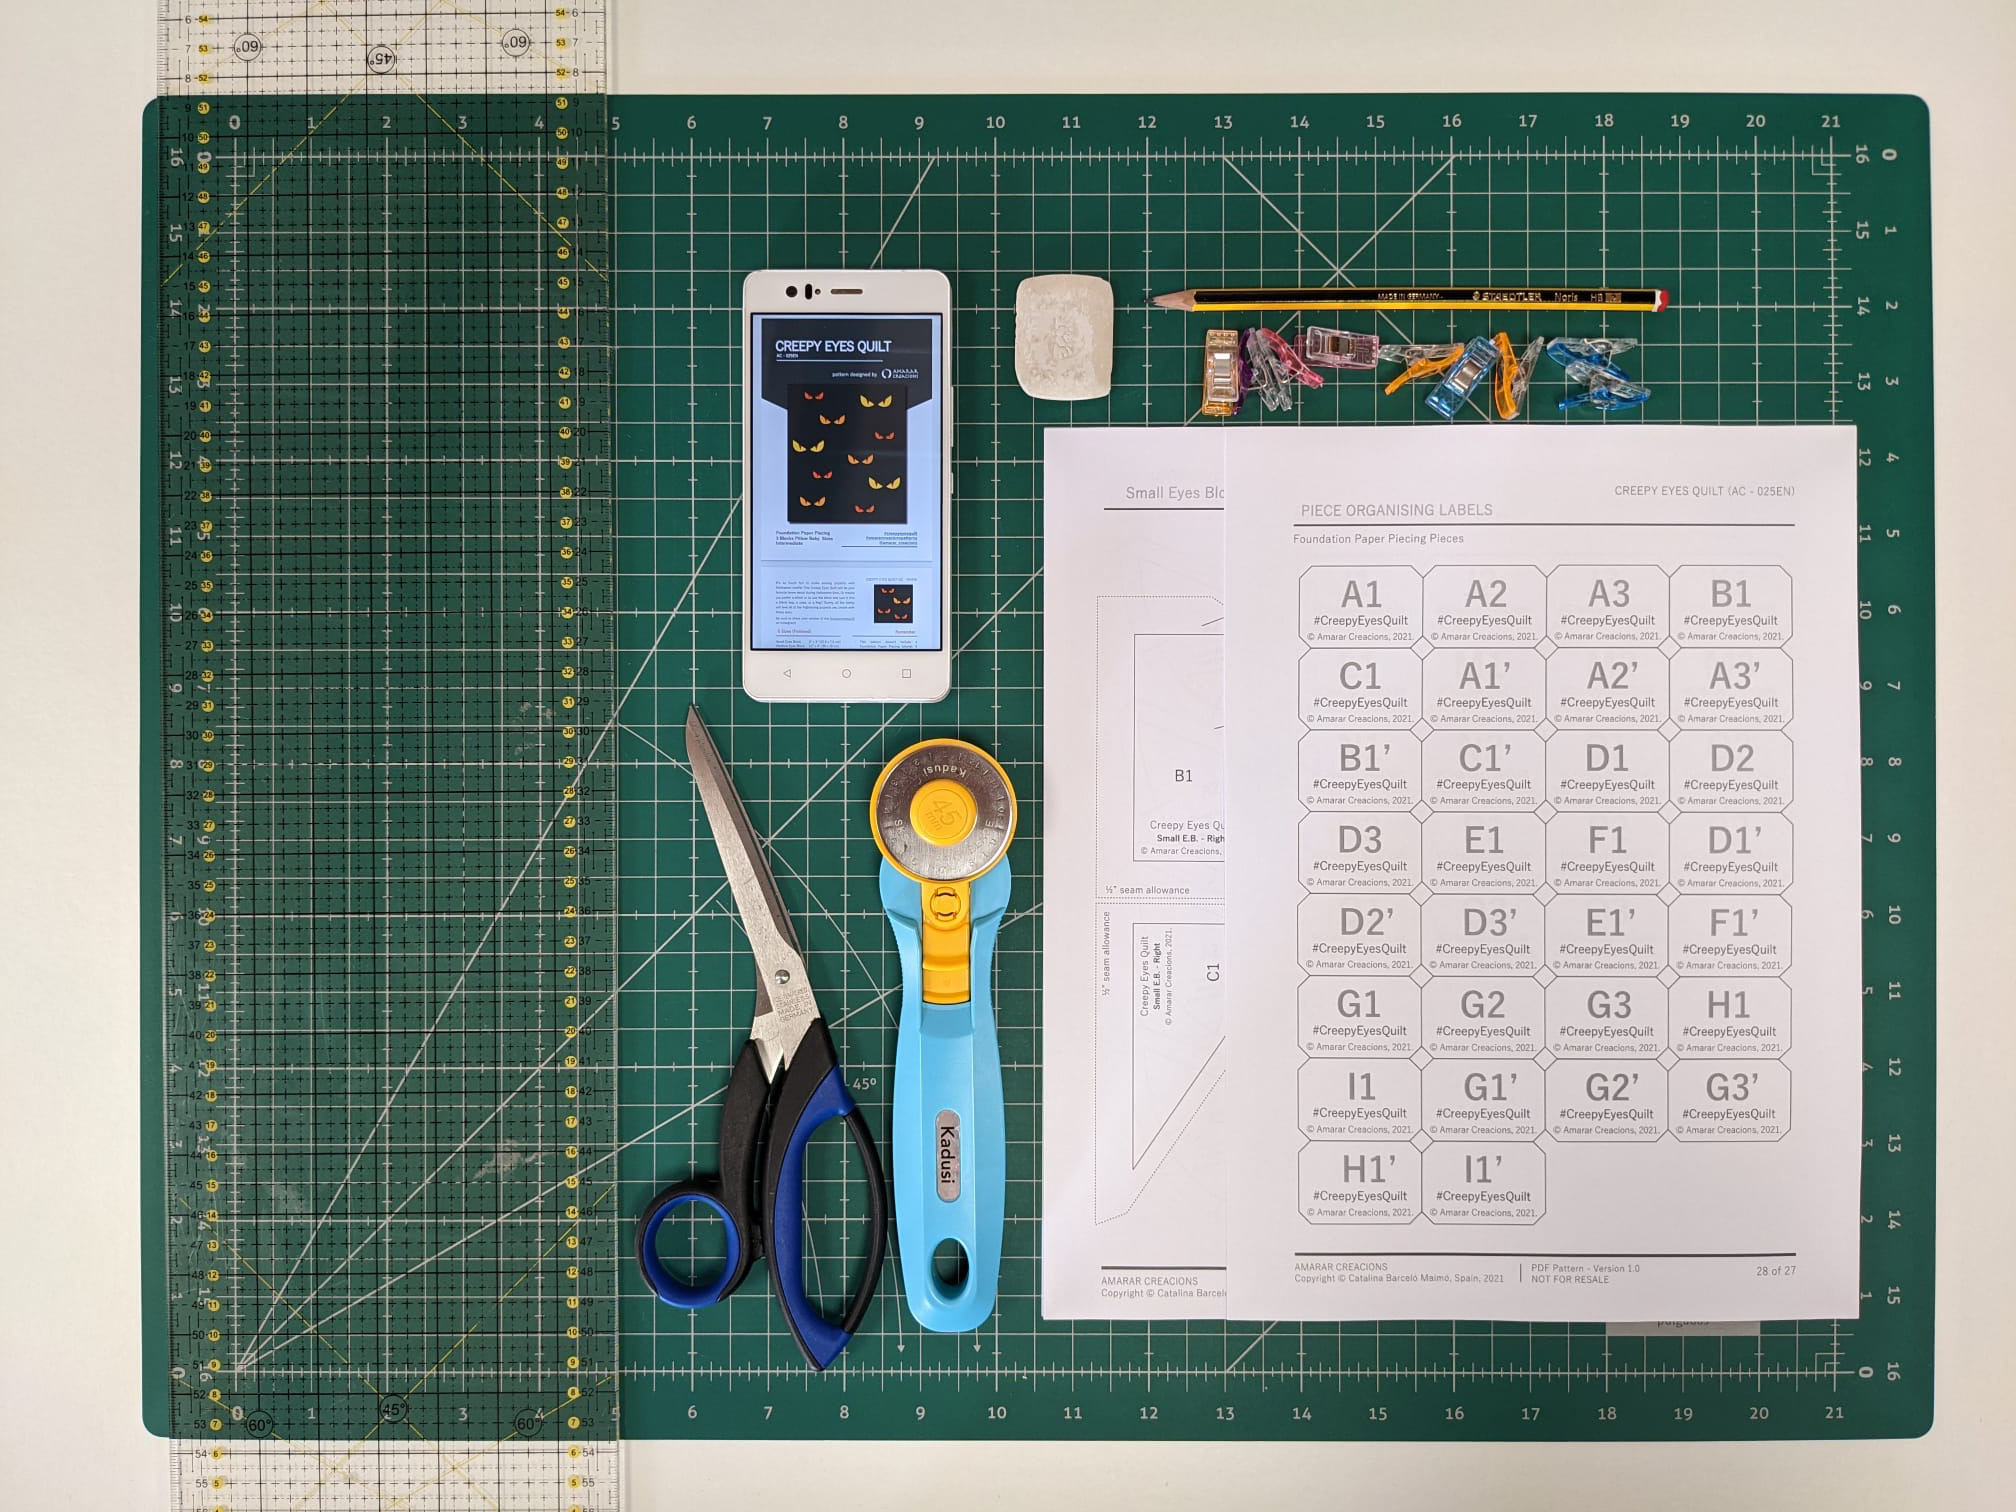
We already talked about the Pattern and Fabrics, but as in any quilting project wee need basic sewing supplies, like the sewing machine, thread according to your fabircs, the rotary cutter, cutting mat, acrylic ruler for accurate cuts, scissors, scissors/cutter to cut the paper, clips o neaddles, fabrics marker, and all you use to use while quilting.
As you can see in this picture, I use the mobile too. As I told you, I don’t use to print all the pattern only the pages I need, like the templates, the organising labels for the fabrics cuts. I don’t use neddles, I don’t like pining my fingers with them, instead I use the clips or nothing!! You will see in the next starges of the QAL….
4. Tasks for next stage
And that’s all! You have 3 days to get ready for the next Starge: hte cutting! So, you have to:
- Get the Creepy Eyes pattern, read it and print the pages you will need.
- Plan your project (remember to use QuiltInk to colour plan it) and get your fabrics.
- Prepare all the other quilting suplies you may need to start in 3 days!!
Remember: share your progress on Instagram using the hashtag #CreepyeEyesQAL and think that as much posts you make about your progress more possiblities you have to win the amazing prize by Quilt Patten Mart at the end of the Stage 2.
Ideas about what you can post: a photo of your fabrics pool, a graphic from QuiltInk woth your colouring plan, a photo about how you use the puzzles pieces to plan your quilt… whaever you can imagine!!
Let me know in the comment your impressions about this firt Stage of the Creepy Eyes QAL! Which project are you gonna make? do you have any questions? do you miss somehting?
It’s really excitng! I can’t wait to get started!
Are you ready with the Stage 1? Visit the next Stage to see how to cut all your fabrics and templates.
Stil thinking about joining this QAL? Hurry up!! Get he Pattern and Sign up to don’t miss any new about it!