


What comes to your mind when you think about foundation paper piecing? Maybe you think – No thank you, because I dread removing papers! When you make a quilts which were foundation paper pieced maube you think you would never do it again because tearing papers off was too time consuming and tedious. Now I am working on a new pattern in collaboration with Irina from NordicCrafter and we are using an alternative paper piecing method using freezer paper. We am very pleased with the results and speed of the technique, especially on the final stage. You don´t need to waste paper for templates and your time for tearing papers off.
Our pattern, made to use foundation paper piecing and specially designed to be made with freezer paper, is the Hexie Tree and very soon, on September 16, it will be available!
So here is a new tutorial for you!
Before we start, I would like to mention that here we shall talk about rather simple designs. I am not sure how it would work for complicated patterns that require precision and have too many pieces. We haven´t created anything that difficult yet.
What you’ll need
- Either Printable Freezer paper sheets or Freezer paper roll. You can either print the templates on Printable Freezer paper sheets or print them on paper and trace onto Freezer paper from the roll.
- Rotary cutter
- Ruler
- Scissors
- Sewing machine
- Iron
We printed the templates on Printable freezer paper sheets.
Important Notes
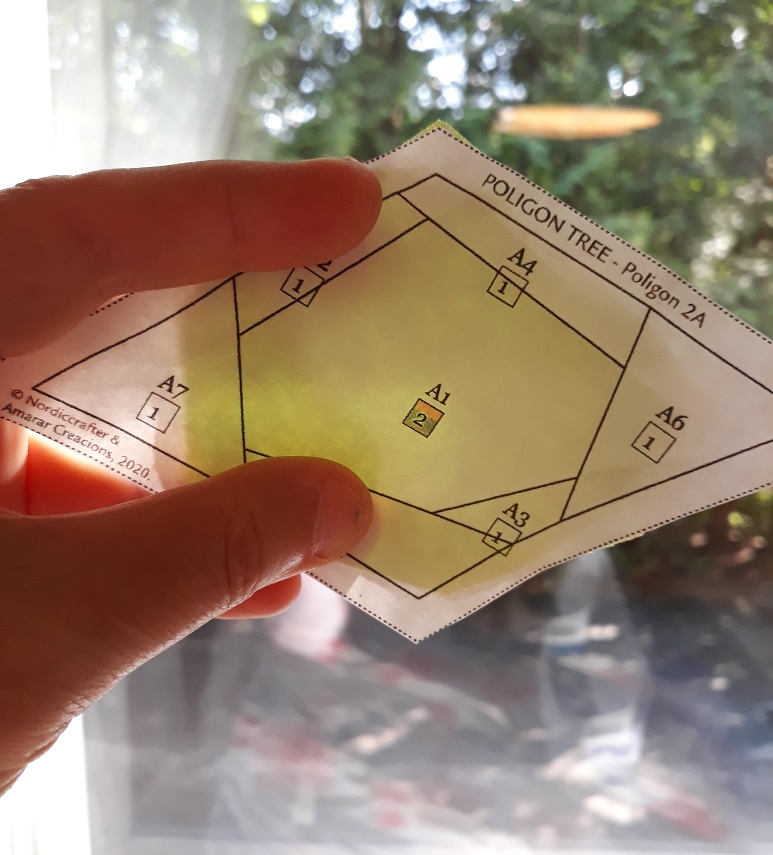
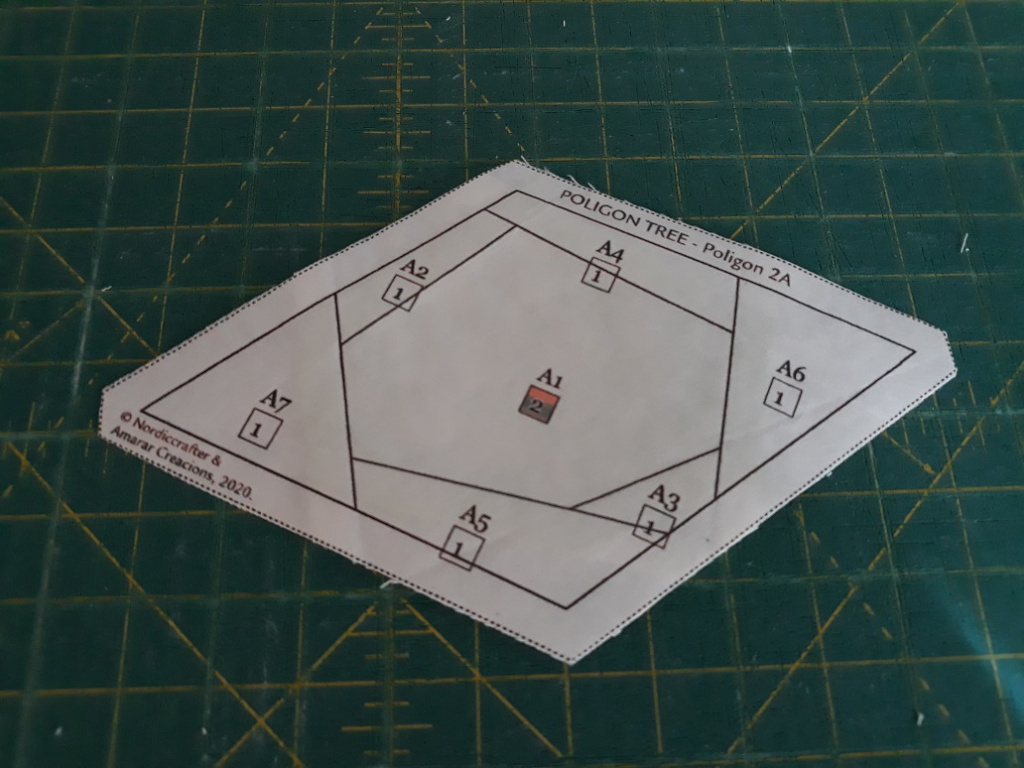
Leaves and Apples in the pattern are irregular polygons – two types of hexagons and a pentagon. We use the term Polygon in the pattern to describe all of them.
This tutorial was written when we had the first draft of the pattern. Since then we changed labelling to simplify and clarify the pattern. In the text I refer to the labels in the pattern. The photos show old labels on templates.
Templates
You need to pay attention to orientation of your pattern template and cutting templates to see if they are mirrored to cut the fabric correctly. For example, in our pattern the cutting templates are not mirrored (the arrows in the picture below show the same sides of the polygon), so to cut the fabric you have to place the templates on the RIGHT side of the fabric.
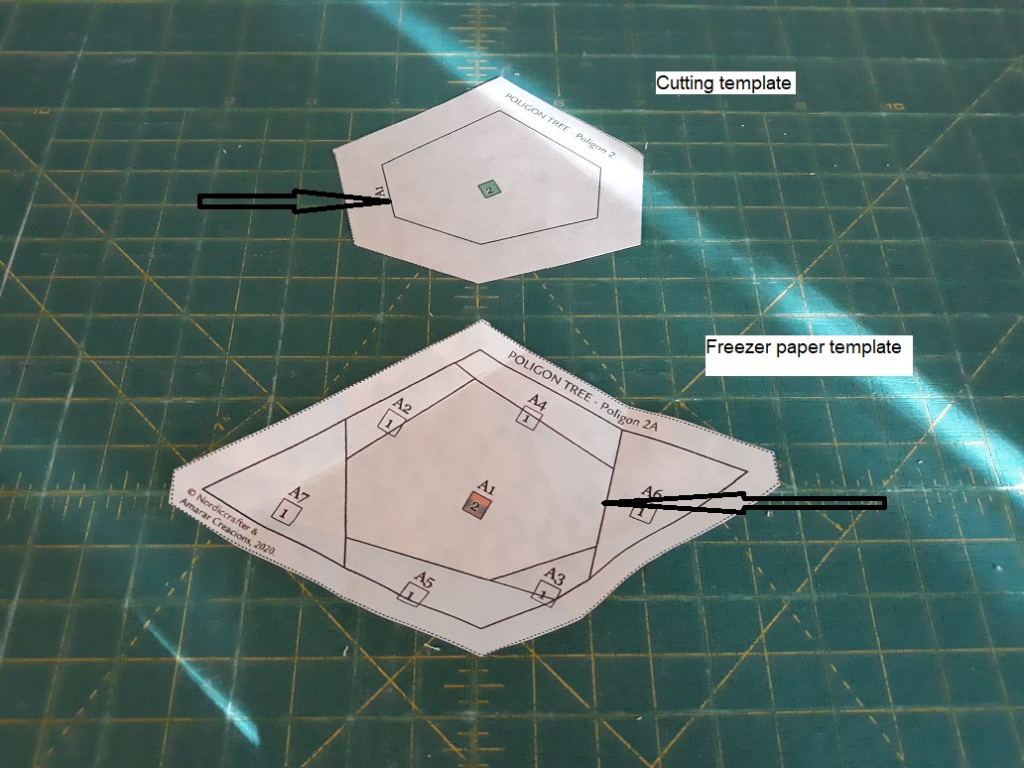
The pattern templates are mirrored, the lines you see on the paper are reversed to the final shape of the sewn block.
Set up
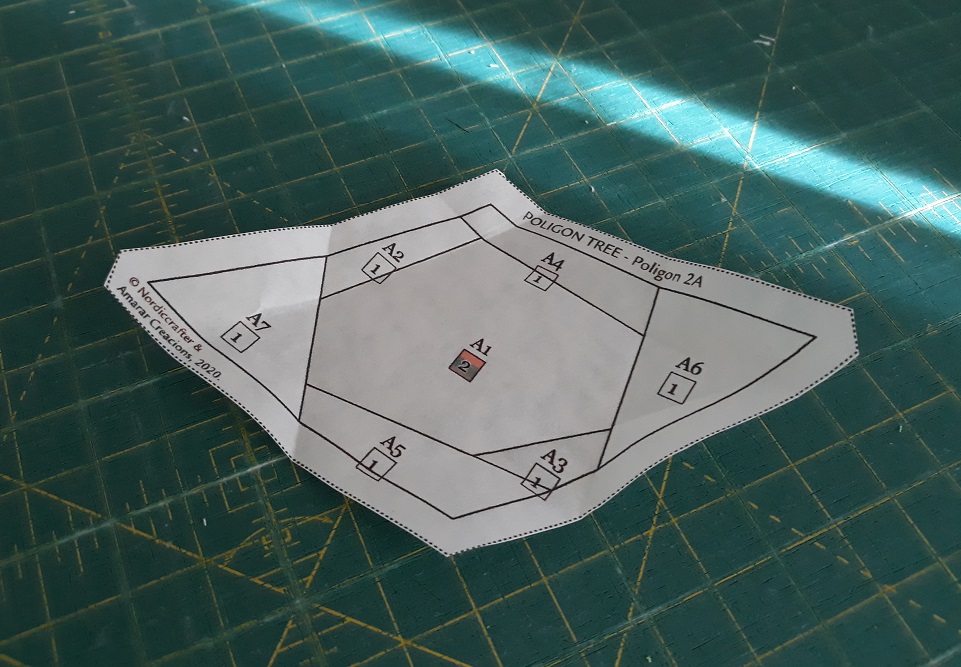
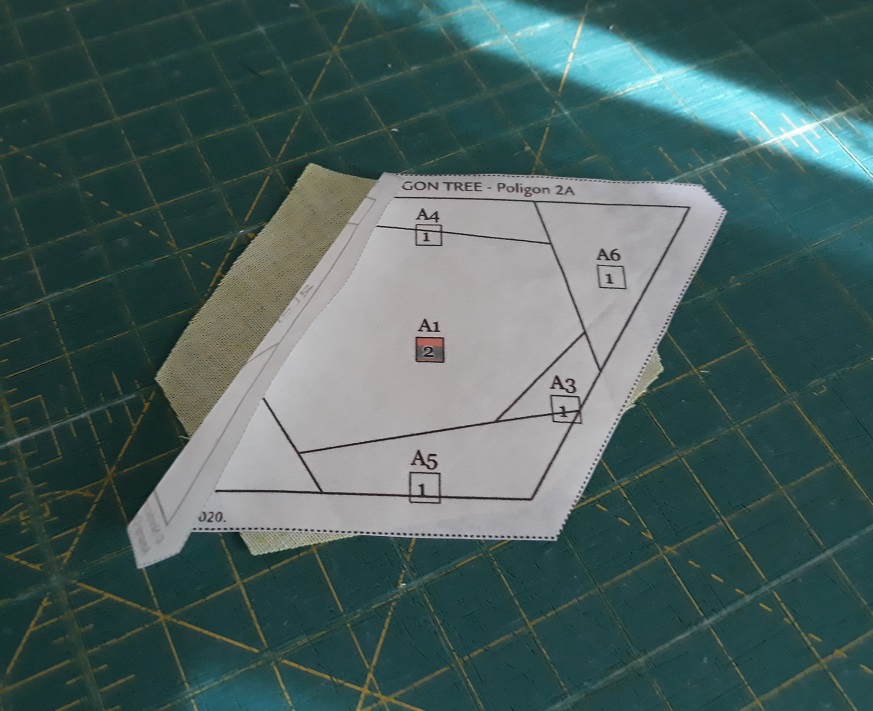
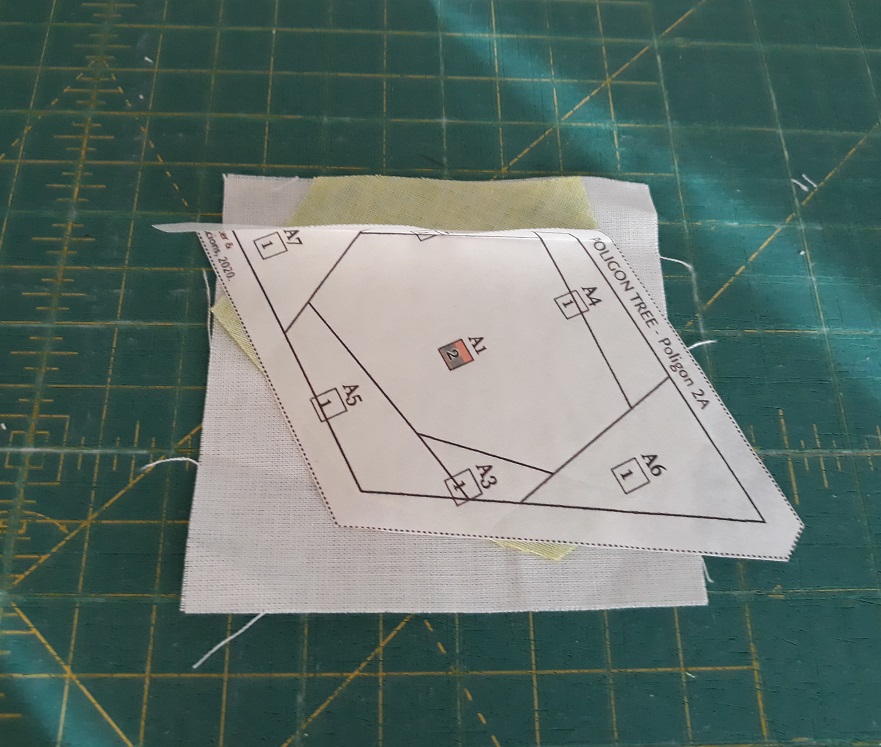
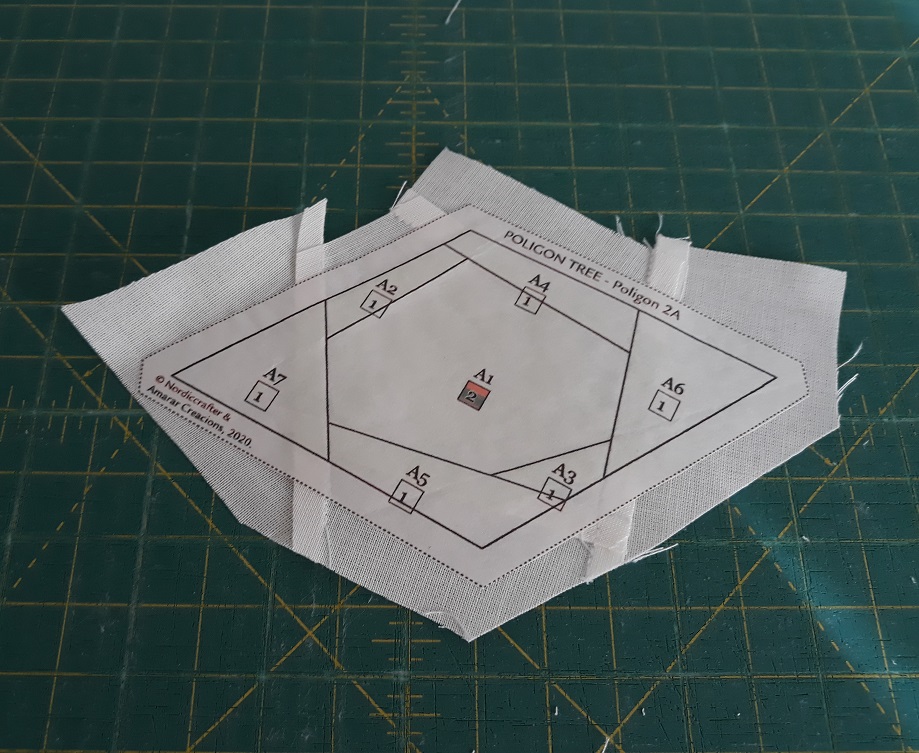
We are going to sew Leaf 2 (L2). It has 7 units (from 1 to 7), and the first one (1) is the hexagon shape.
Sewing machine
When you use foundation paper piecing you need to decrease the stitch length, but for freezer paper piecing you DO NOT need to do it as we are not going to stitch through the paper. We used 2,0 stitch length, the one normally used for piecing.
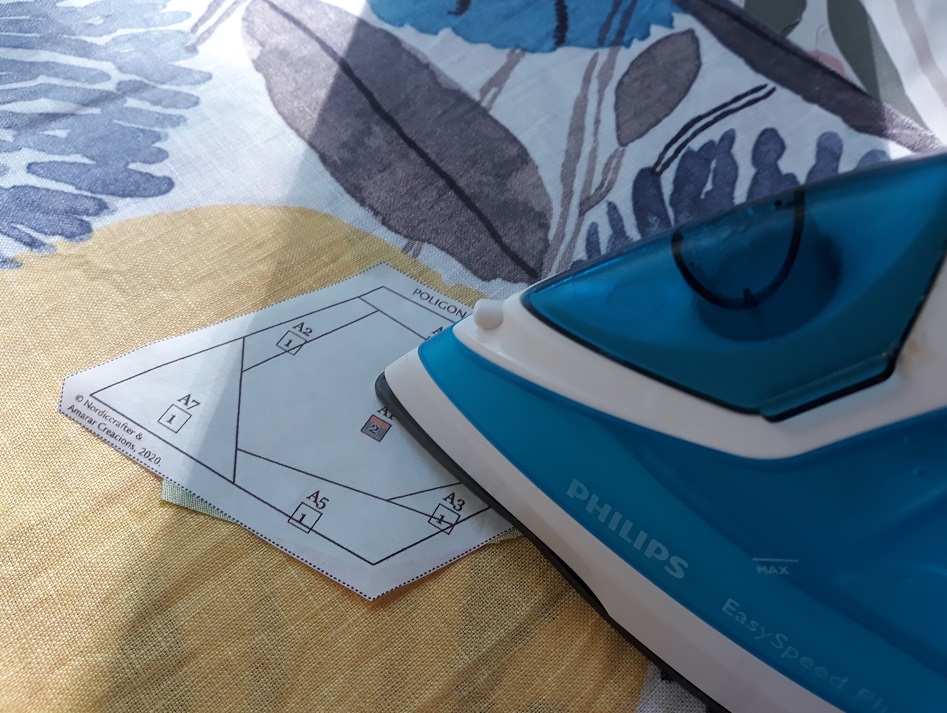
Ironing
Always press with hot iron set for cotton WITHOUT steam. Steam may cause the distortion of the sewn piece. Also try to avoid placing the iron on the sticky side of the freezer paper template. You can also place baking paper on top of the fabric so the Iron does not stick to the freezer paper.
Cutting
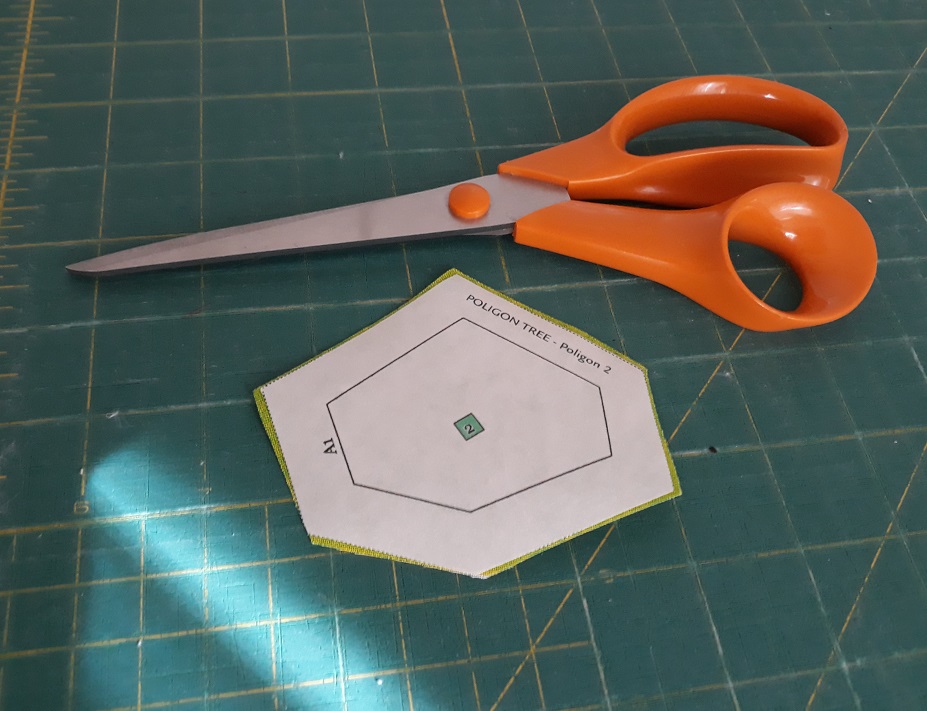
First, cut the Hexagon shape (Leaf 2, ) with the cutting template. You can either use a template printed on regular paper and cut with rotary cutter or you can use the template from freezer paper. Place the cutting template for Leaf 2 to the right side of the fabric, iron it on and cut it out with scissors (you don´t need precision at this stage as the cutting template has a generous 1/2 inch seam allowance).
Pre-cut or not to pre-cut fabric?
General recommendation – if you have cutting templates for a pattern, it makes sense to prepare them before your start sewing. It takes time to pre-cut units but you will have less fabric waste and your sewing will be quicker and more enjoyable, especially if you are a beginner.
Our pattern only offers cutting templates for the polygon units (Leaves and Apples). For other units we used scraps of white fabric. we either roughly cut a piece with scissors that was big enough to cover the unit with seam allowance or used a bigger scrap. There was more waste for sure but we was able to reuse some off cuts of white fabric as some units in the template are quite small. So this method works well even if you only pre-cut the first unit like in our pattern.
Freezer paper piecing
Let´s start sewing.
Fold your pattern template along the lines to create creases. They will be used as guides for your stitching when we start sewing.
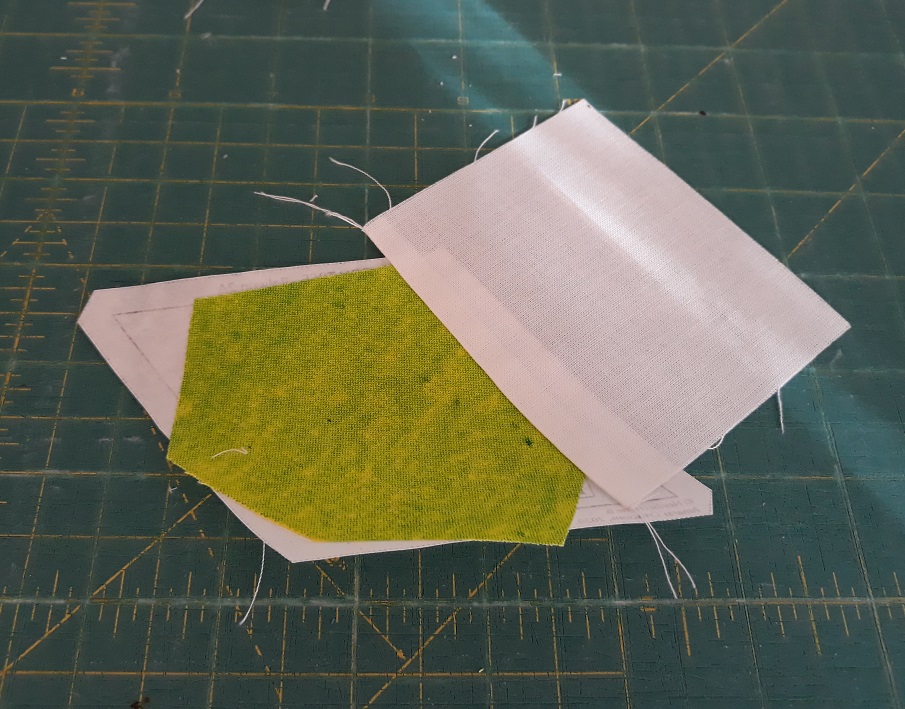
Place the polygon unit 1 wrong side of the fabric to the sticky side of the pattern template. Make sure you have more or less the same seam allowance around it (check it against the light ).
Iron it on from the printed side.
Fold the freezer paper template along the line between units 1 and 2 (sticky side up) and expose the seam allowance of the fabric (unit 1).
Cut a scrap suitable in size for the unit 2. Make sure to check against the light that you have at least 1/4’’ allowance (the bigger the better, I prefer 1/2″). Note that you can prepare the scraps for all units before sewing or cut them as you go.
Put the scrap of white fabric underneath the unit 1 (right sides together) aligning the edges of both fabrics (I intentionally put a large piece so you can see how to do it).
If you are not familiar with foundation paper piecing you can check my tutorial in my Facebook group (https://www.facebook.com/groups/FPPAmararCreacions). There you can find step by step instructions how to turn fabrics and sew them together.
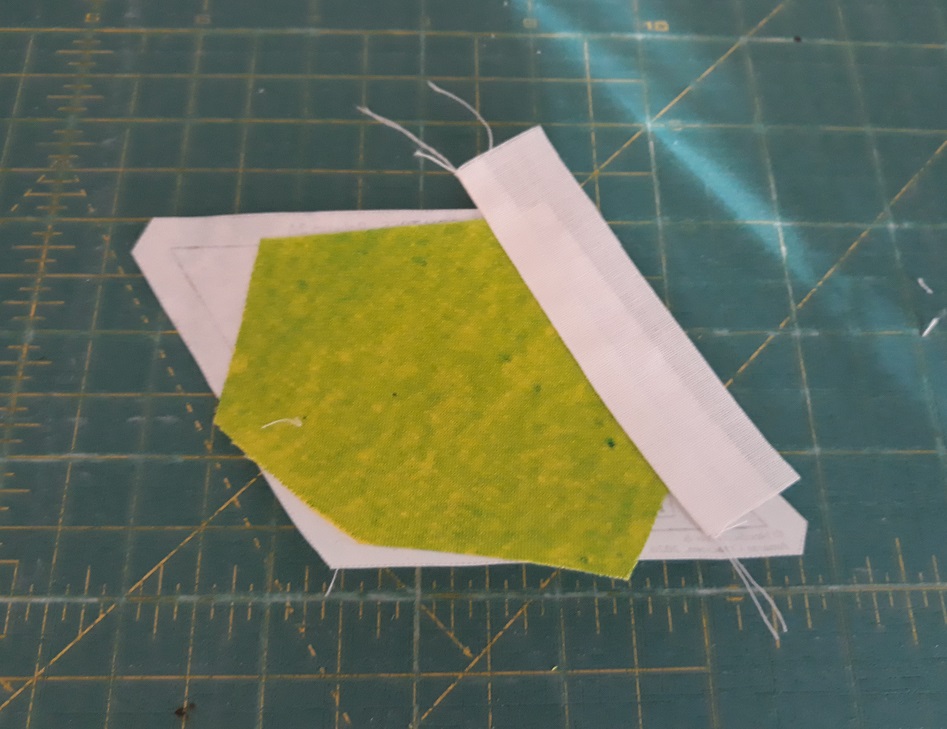
Stitch as close as possible along the crease (but not on the paper).
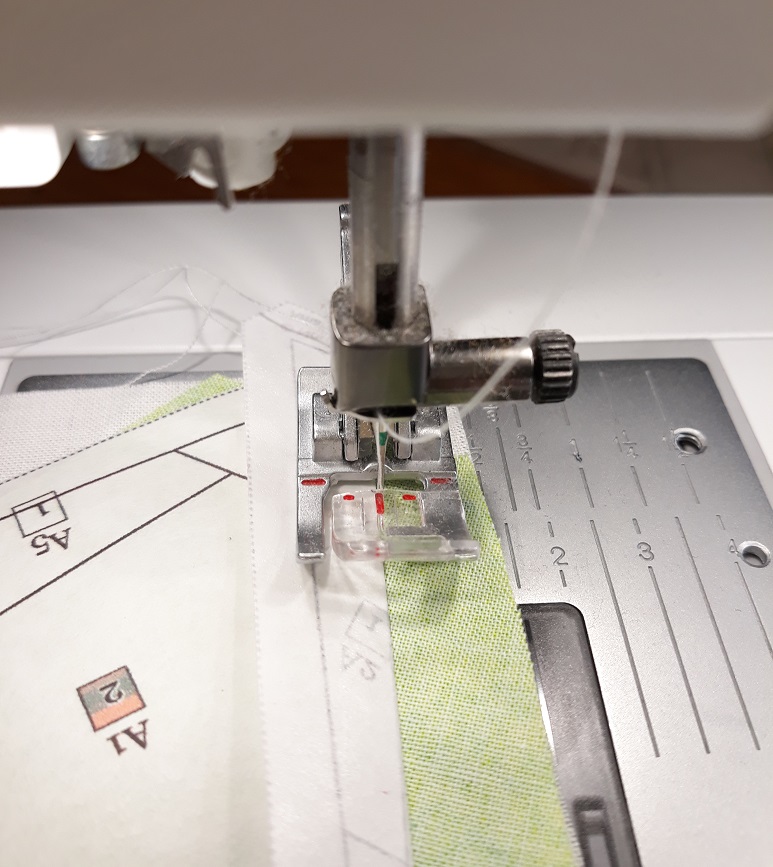
Trim the seam allowance to 1/4 inch using a ruler and rotary cutter.
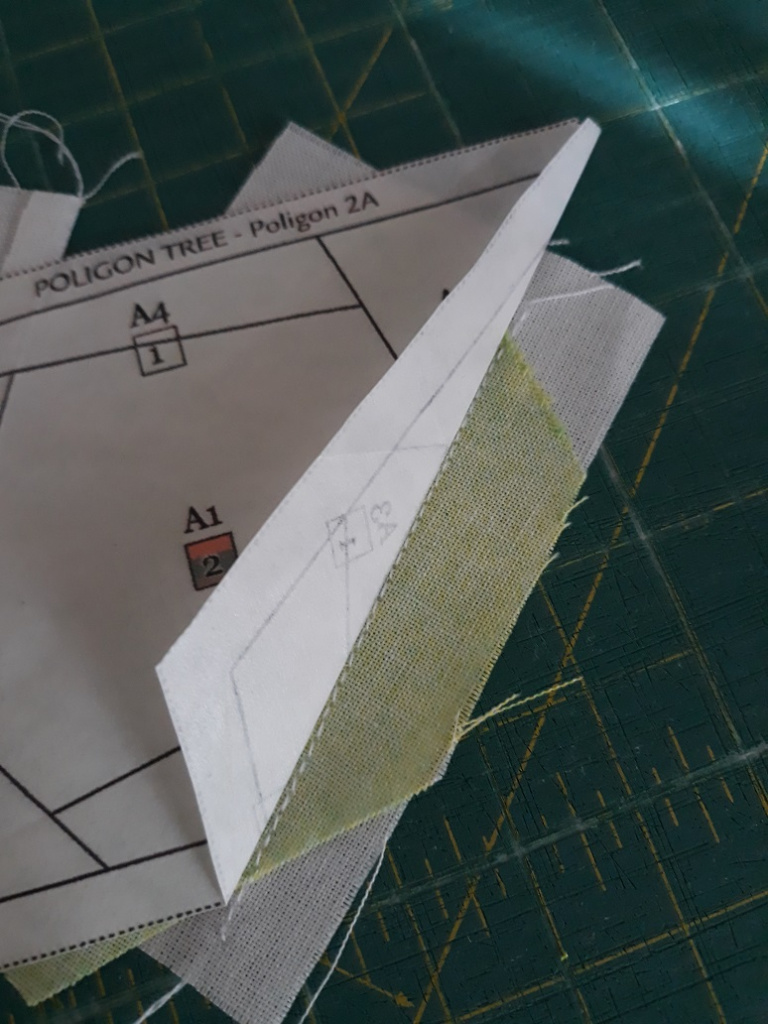
Unfold the crease line between units 1 and 2, place the template (printed side down) on the ironing board and finger press the seam. Then press it with hot iron, making sure the attached fabric unit 2 sticks to the template and the seam is nice and flat.
If you are using scraps like me, you might need to roughly trim the excess of fabric outside the template with scissors or rotary cutter and reuse the off cuts.
Now, fold the line of the pattern template between units 1 and 3 and repeat the same process as with unit 2.
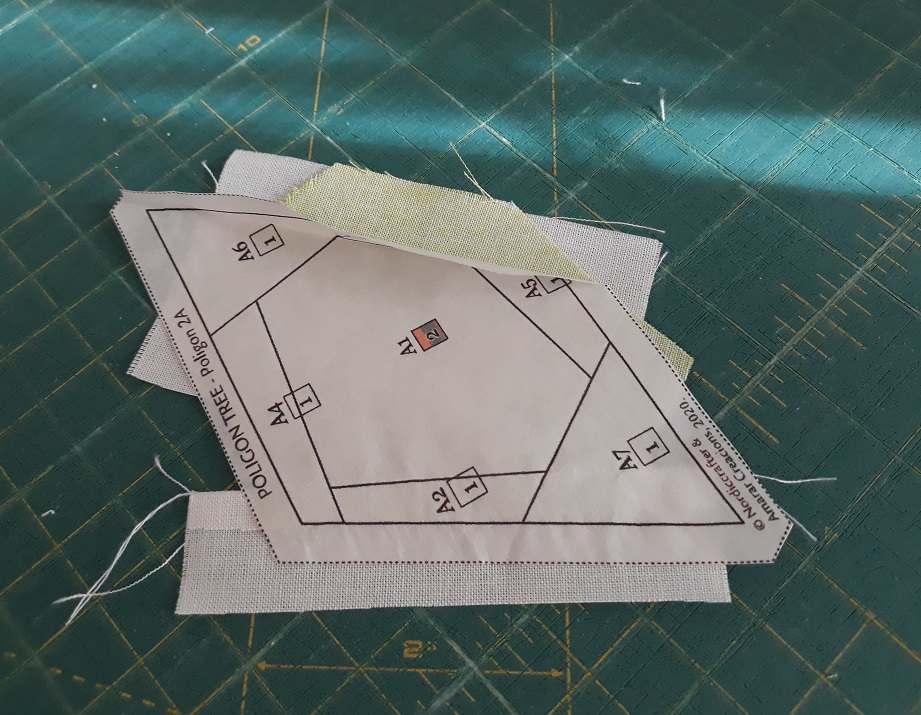
Add units in the order repeating the steps. Here is the view from the wrong side.
Here is the right side.
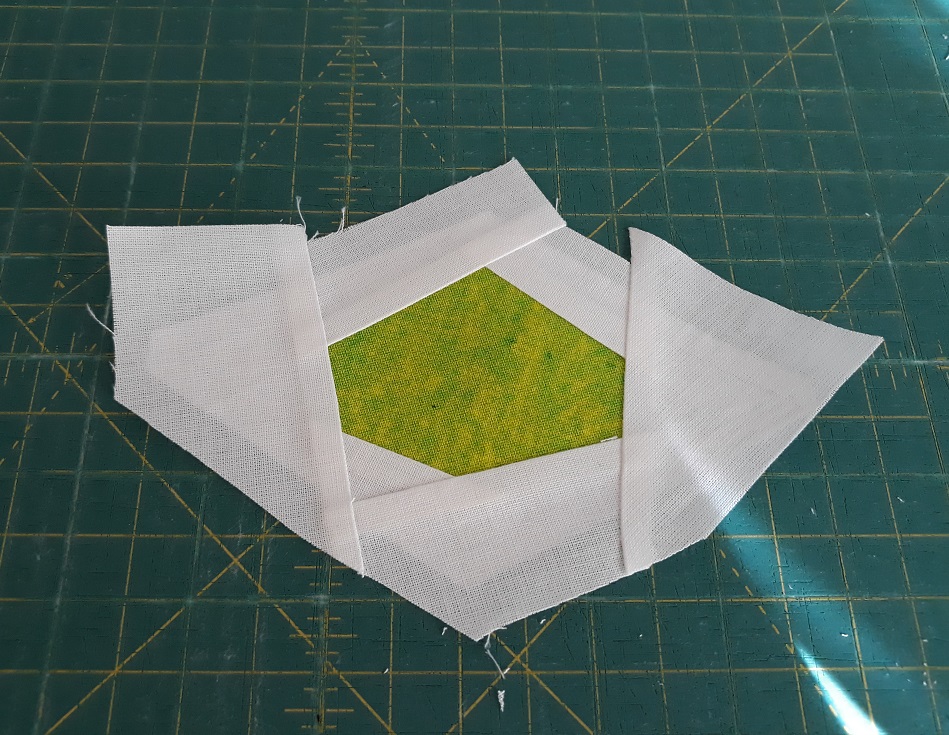
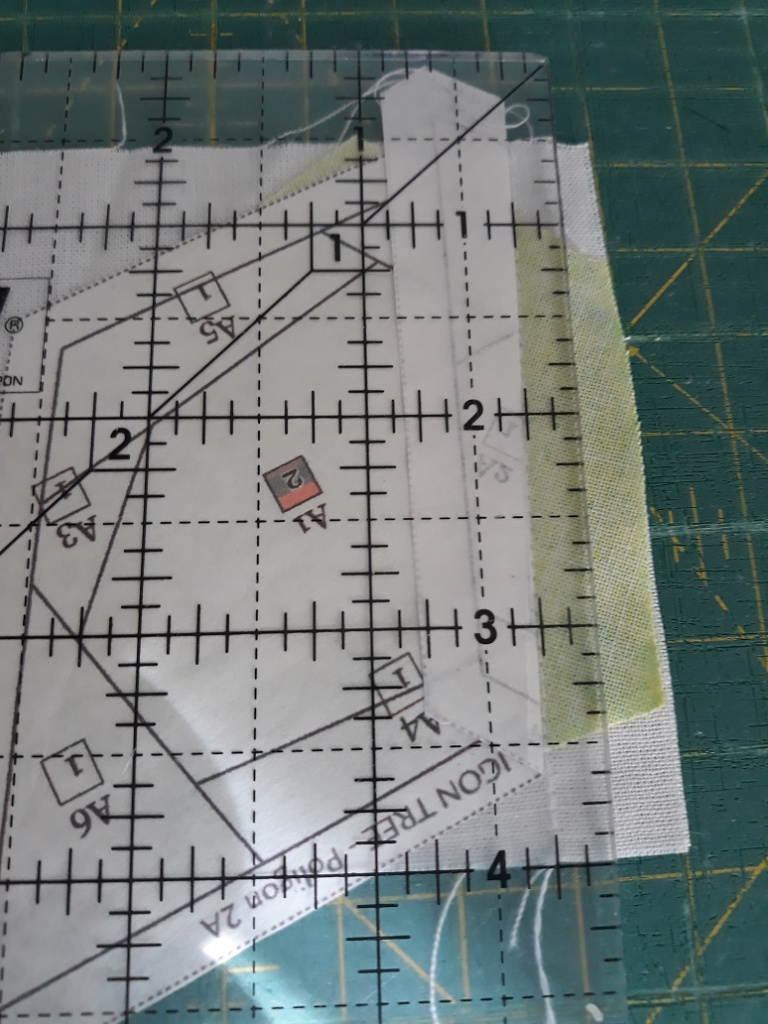
Trim the block to the size using ruler and rotary cutter.
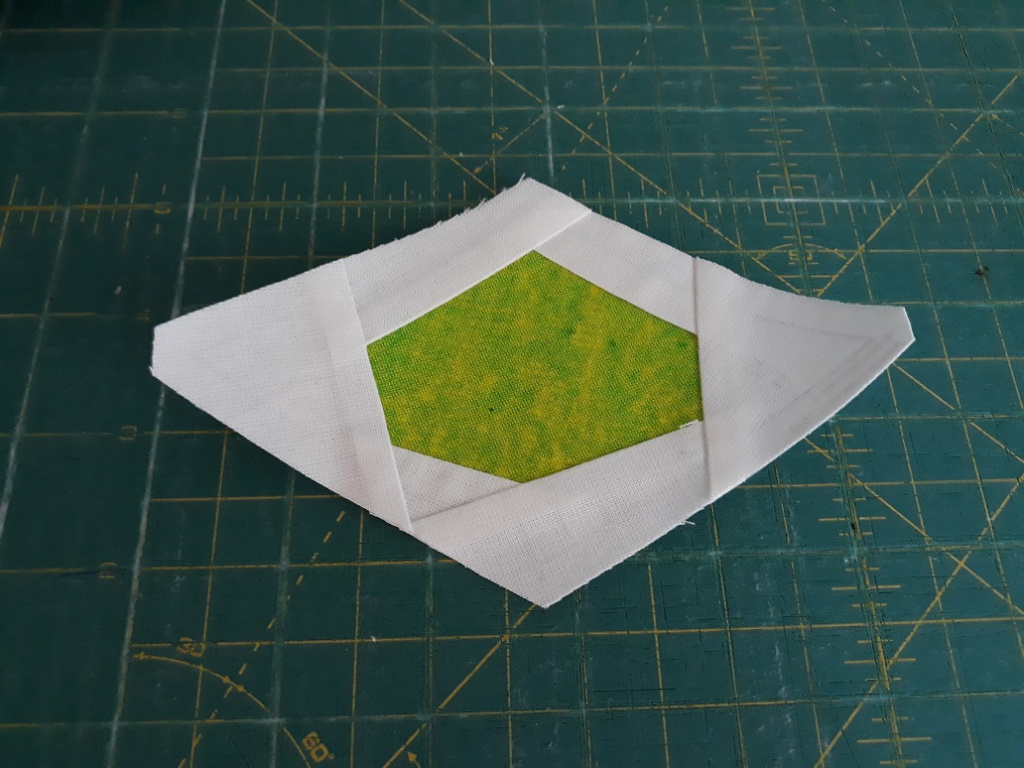
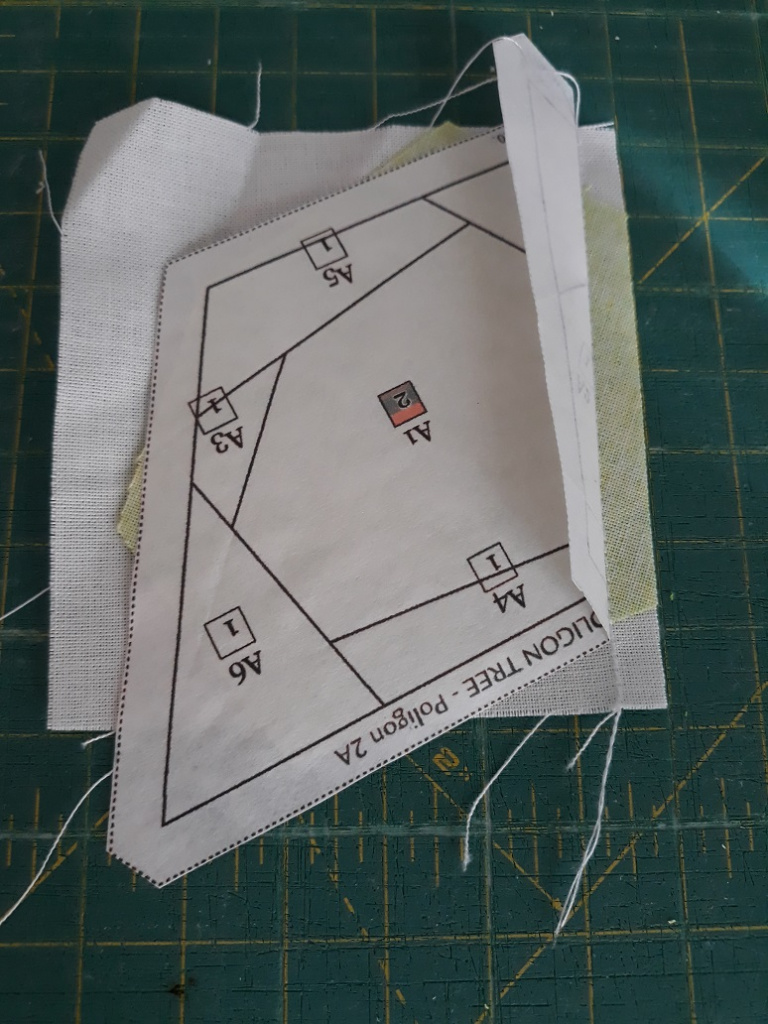
Gently peel the freezer paper off!
Your block is ready. Now you can use the freezer paper template for the next block.
Chain piecing
We printed only 1 pattern template for each Leaf/Apple and we was working on 3 pieces at the same time – Leaves 1, 2 and 3. If you want to speed up the process you can print or trace few pattern templates for each polygon and work on 2-3 (depending on how many pattern templates for the polygon you have printed or traced) at the same time.
Once we posted this tutorial, we got a great tip on IG from Helen @helen_ellice regarding an easy way to get more templates without tracing every single one. You can print just one template on the freezer paper or trace 1 template from normal paper onto freezer paper. Cut up to 5 pieces from the freezer paper the same size as your template. Staple them in 2 places with the traced template on the top. Using normal stitch length stitch on your sewing machine without thread along the pattern lines. This method allows you to get few templates and perforations for easy creasing.
Our pattern is designed in a way to speed up the piecing process you can attach units 2 and 3 to unit 1, then trim the seams and iron them, units 4 and 5, and units 6 and 7. Of course, in the beginning it will take time but you will see how much faster it gets once you master the technique. When we sewed the first polygon block it took about 15 min to finish one block, at the end we managed to do it in 7-8 min depending on the type of polygon.
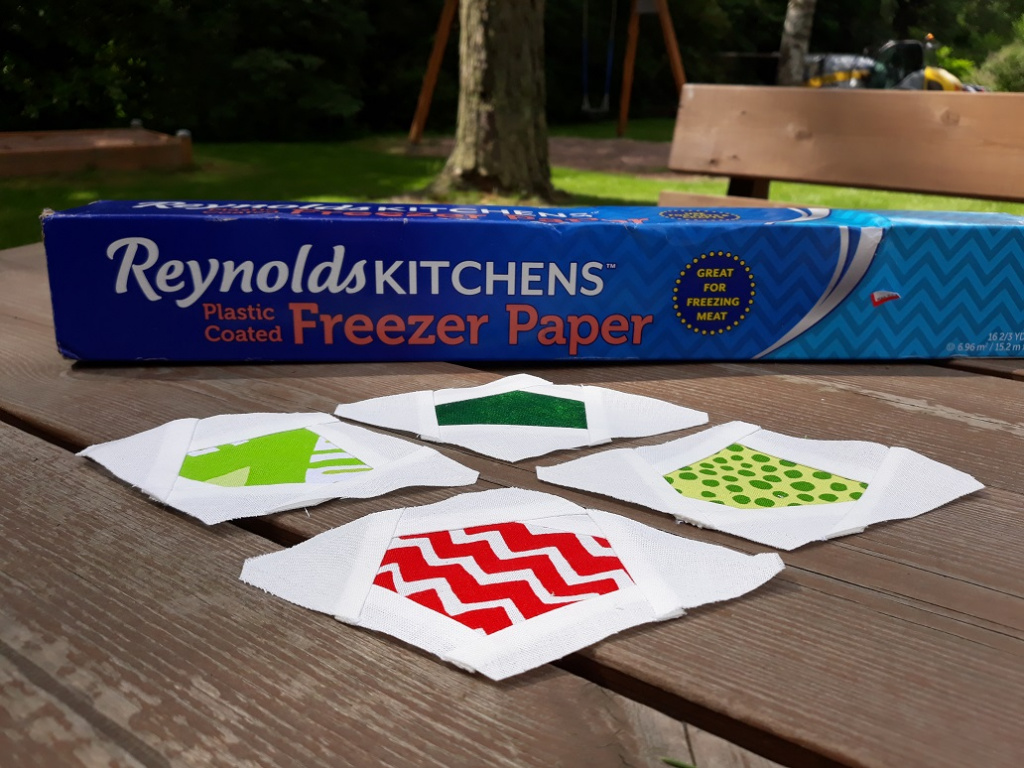
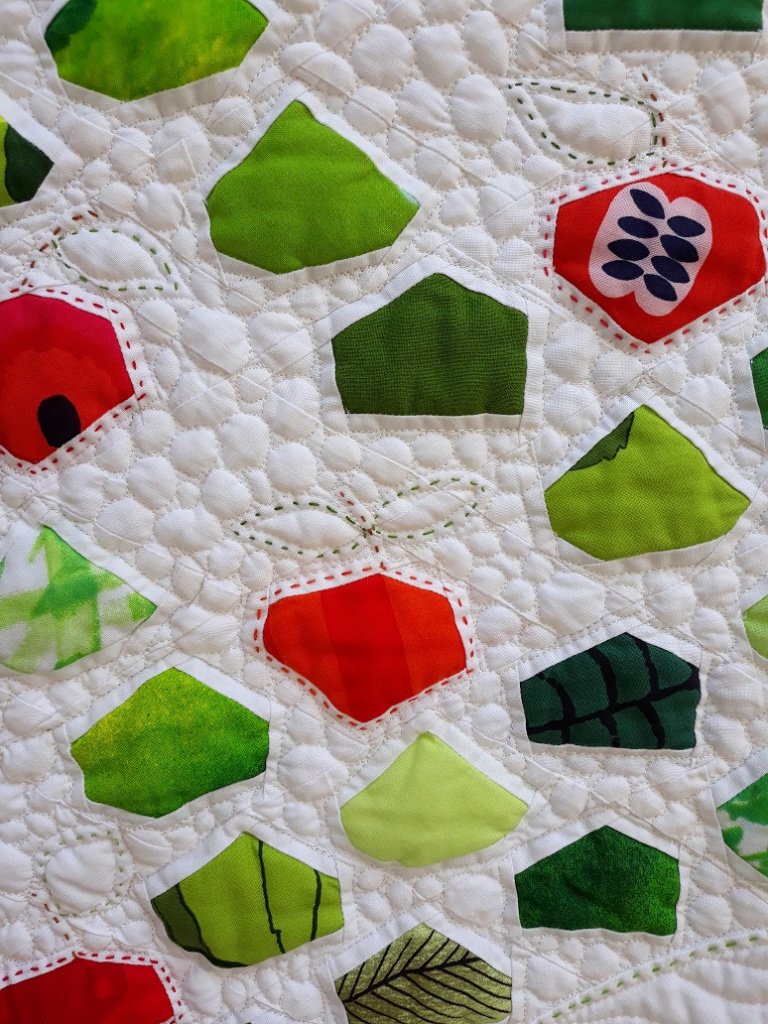
And here a little sneak peak about the result you can get with our Hexie Tree Pattern.
We highly recommend this easy method and I hope it will change your experience in paper piecing in a positive way.
Happy stitching!